Looking for some inspiration for your next climb? Wish you had more photos of your climb other than the sunrise at the summit?
Photo opportunities in the mountains are endless but it’s all too easy to miss when we are not looking. I’m trying to make better memories of my time on the mountains. So I have decided to look for ideas to up my photography game.
And you don’t have to be a professional photographer and have expensive cameras.
Here are 40 ideas to inspire you!
| If you are new to mountain climbing, check out these helpful guides: – How To Start Mountain Climbing Today: 10 Simple Steps – What Are The Dangers Of Mountain Climbing: 15 Potential Hazards – Why Go Mountain Climbing: 25 Things To Do At The Summit – What Is The Difference Between Mountaineering And Alpine Climbing? |
Photography Ideas For Sceneary
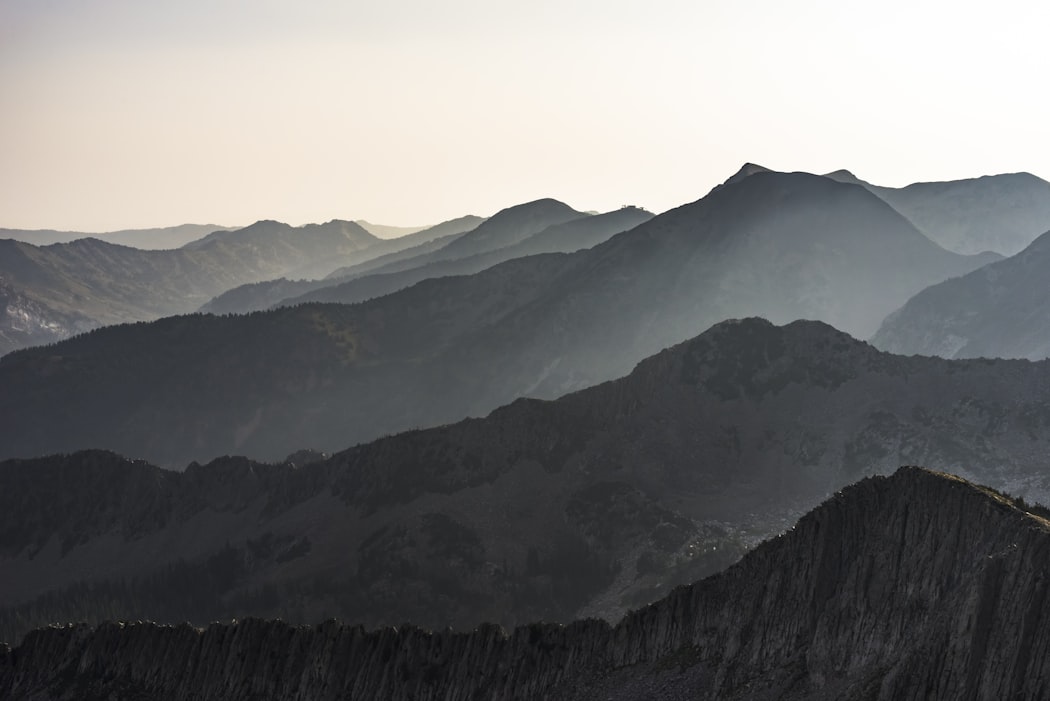
1. Mountain Ranges
Some tips:
- Do some research beforehand. Find out the general location or direction of the mountain ranges around you.
- Your pictures will look more interesting if you can capture several layers of mountains in the distance.
Examples:
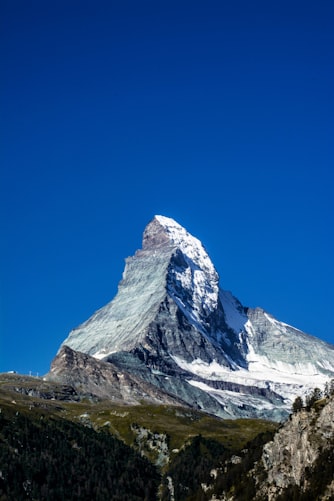
2. Sharp Symmetrical Peaks
Examples:

3. Unique Rock Formations
If you are climbing in an area known for their unique rock formations, don’t forget to capture as many of them as you can!
Some tips:
- The best time is in the early mornings or late afternoon when the sunlight is not so harsh. It is more likely for the photo to be evenly exposed in such lighting and you can see more details of the formation.
Examples:


4. Unique Rock Surfaces
Even if there are no unique rock formations, you can get some unique close up shots of the terrains around you.
The possibilities are quite endless here. If you see something interesting that catches your eye, just snap a few photos!
Examples:


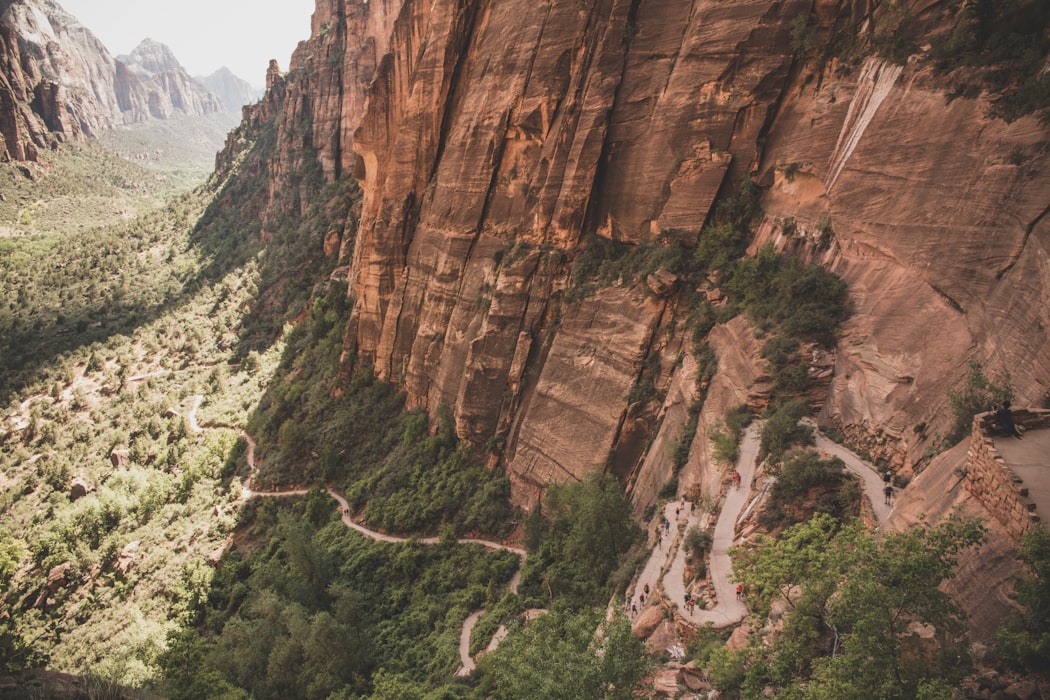
5. Bird’s-eye View
Example:
6. Stars And The Galaxy
It’s strange how I never really noticed the stars when I am in the mountains. Maybe my brain has frozen in the cold. Or maybe I am just blinded by the flashlights shining in my eyes every other minute.
This is the best chance to get an unblocked view of the stars for miles and miles, far away from any light pollution.
Some tips:
- You need a tripod for this. Or at least a stable surface to place your camera for long exposure shots. You are unlikely to capture much with the default camera settings or with your phone.
- You probably need to get some distance away from the campsites. Campsites tend to be quite well-lighted.
- Test out your night settings for your camera at home! You don’t want to be struggling with the settings when you can barely feel your fingers.
- For your safety, don’t go anywhere alone after dark! If you must do so, make sure to inform someone and let them know when you are expected to return.
- Make sure you have spare batteries for your flashlights. Cold temperatures can make batteries go out faster than usual.
Examples:

7. Cloudy Or Foggy Days
Cloudy or foggy days are usually a bummer because so much of the scenery and views are being hidden.
But not all is lost. Always keep your eyes out for moments where the clouds or fog start to thin. They might only clear for a short while at a time so it’s easy to miss.
Clouds can sometimes make the scenery look more dramatic and mysterious.
Examples:


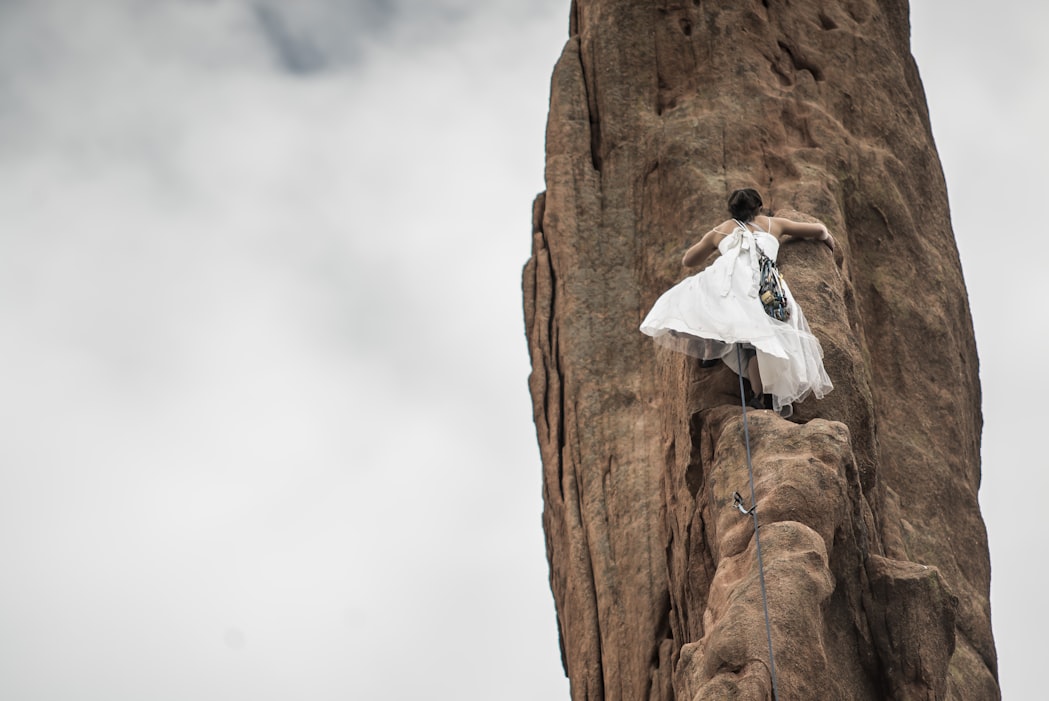
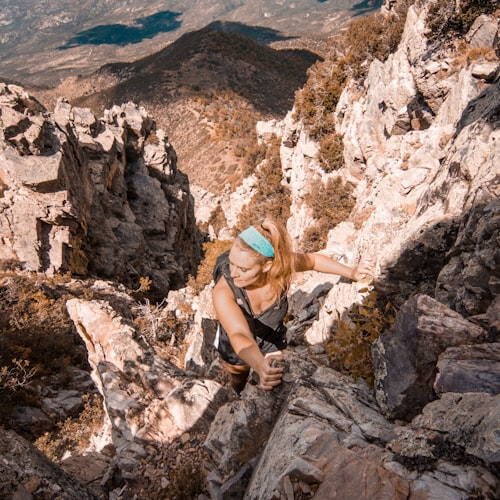
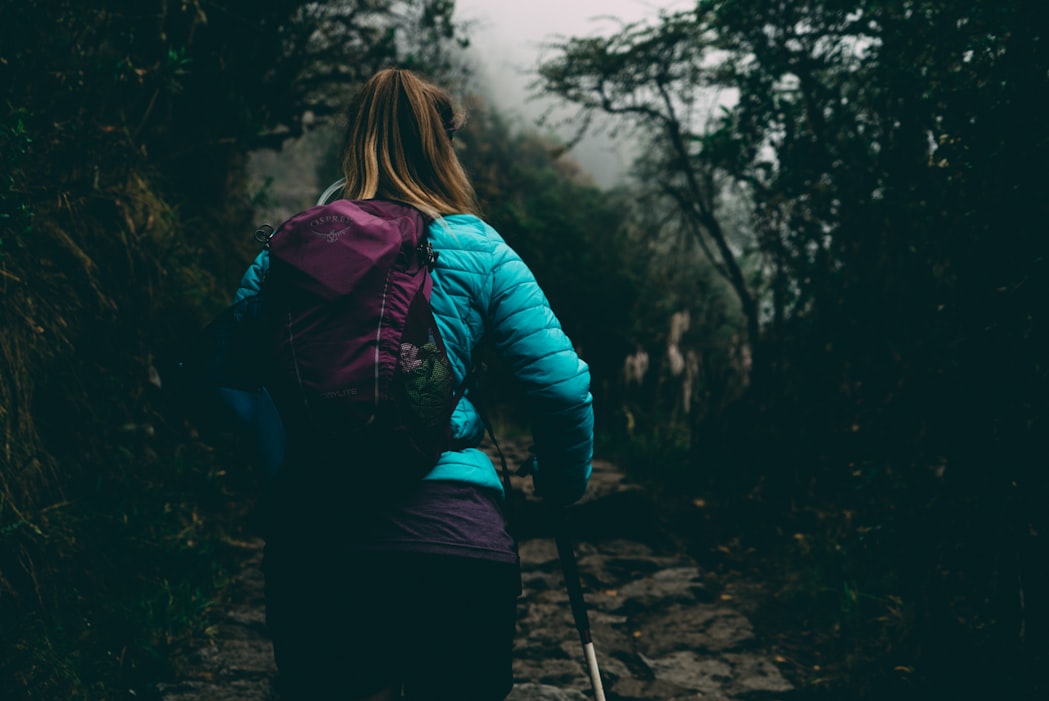
8. The Last Stretch
.
If you are lucky (or maybe not), your last stretch to the summit will be a sharp, steep climb.
Personally, I like such shots of myself with the summit much better than the shots I have at the summit. It looks very
Examples:


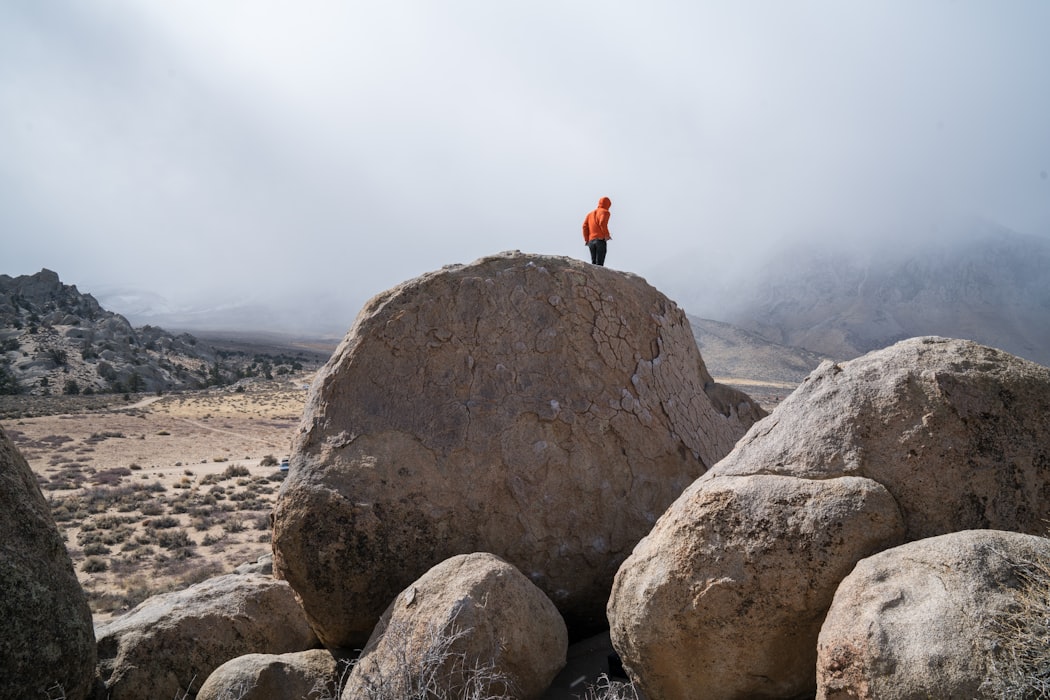
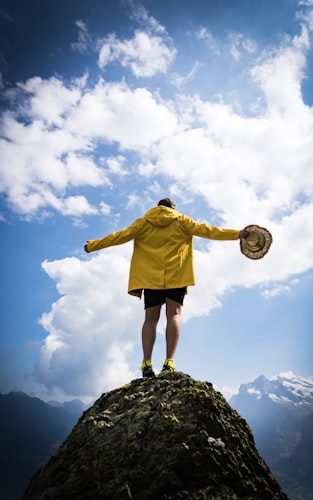
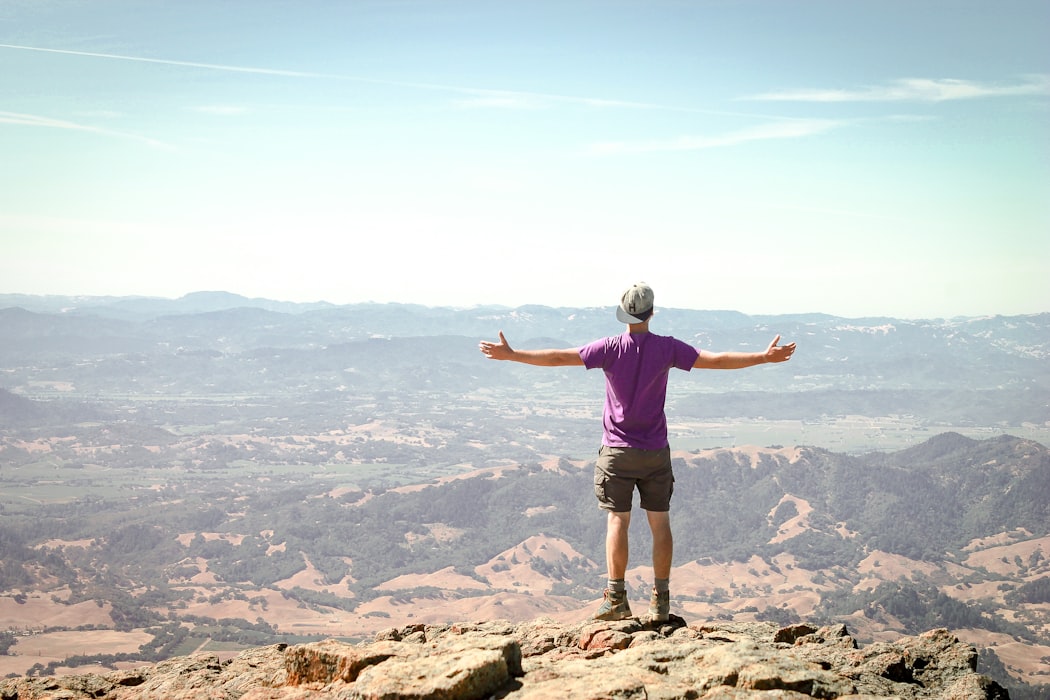
9. At The Summit
No climb is complete without a shot of you at the very top!
Some tips:
- Look for opportunities to take a photo from a distance away.
- If you would like an individual shot, take turns with a photo buddy. Stay behind to take a photo of them at the top. Then get them to descend first to take a photo of you at the top.
Examples:


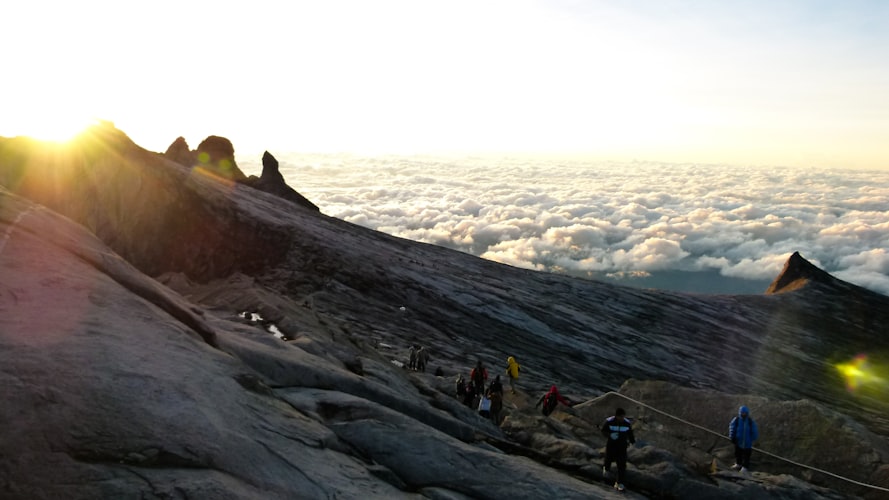
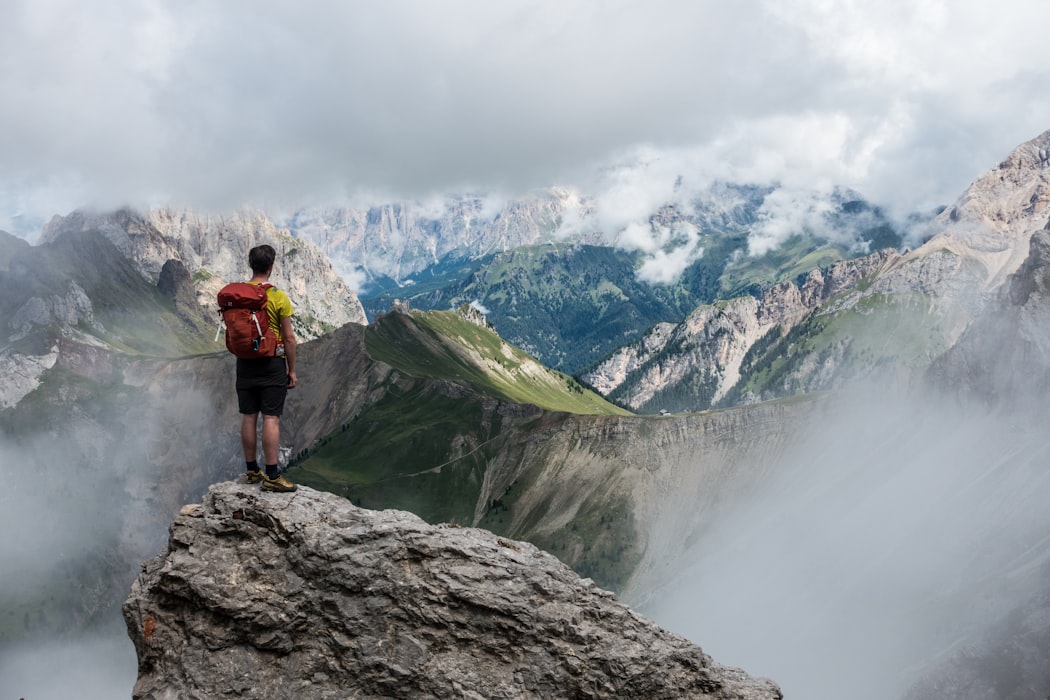
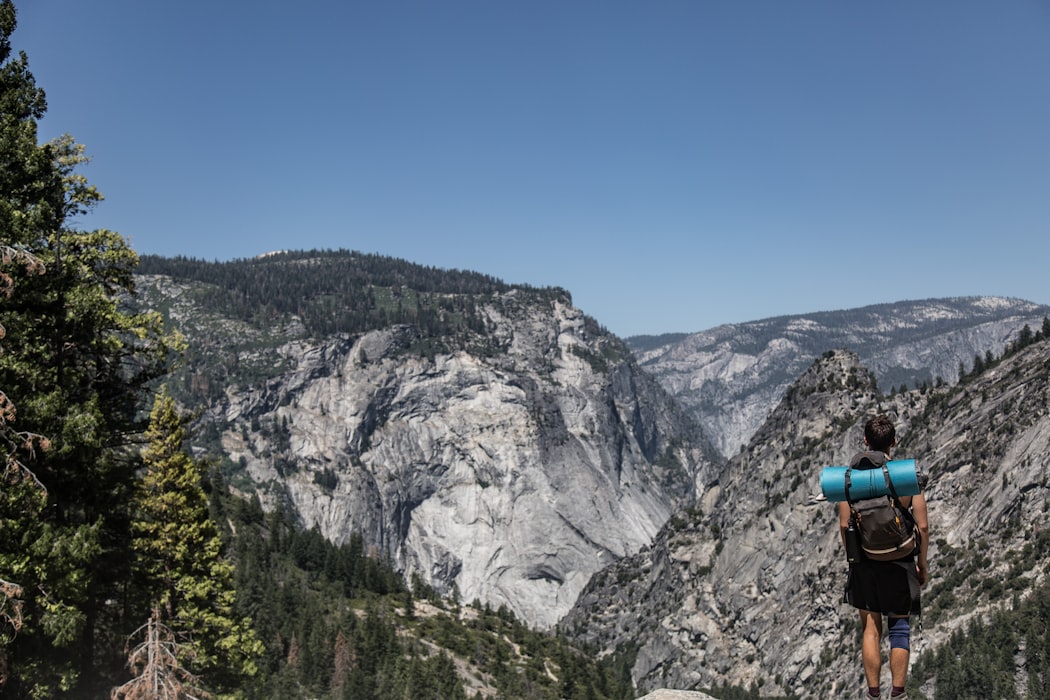
10. Above The Clouds
This is probably a dream for many. To capture a scene where you are standing above a sea of clouds.
This depends a lot on timing and luck. And of course the height of the mountain you are climbing. You will probably need to be above 10,000 to 12,000 feet (3,000 to 3,600 meters) before dawn to capture this.
Examples:

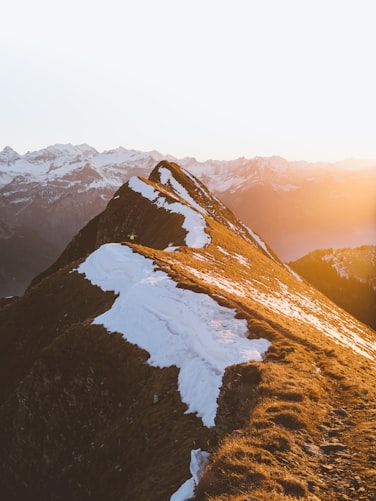
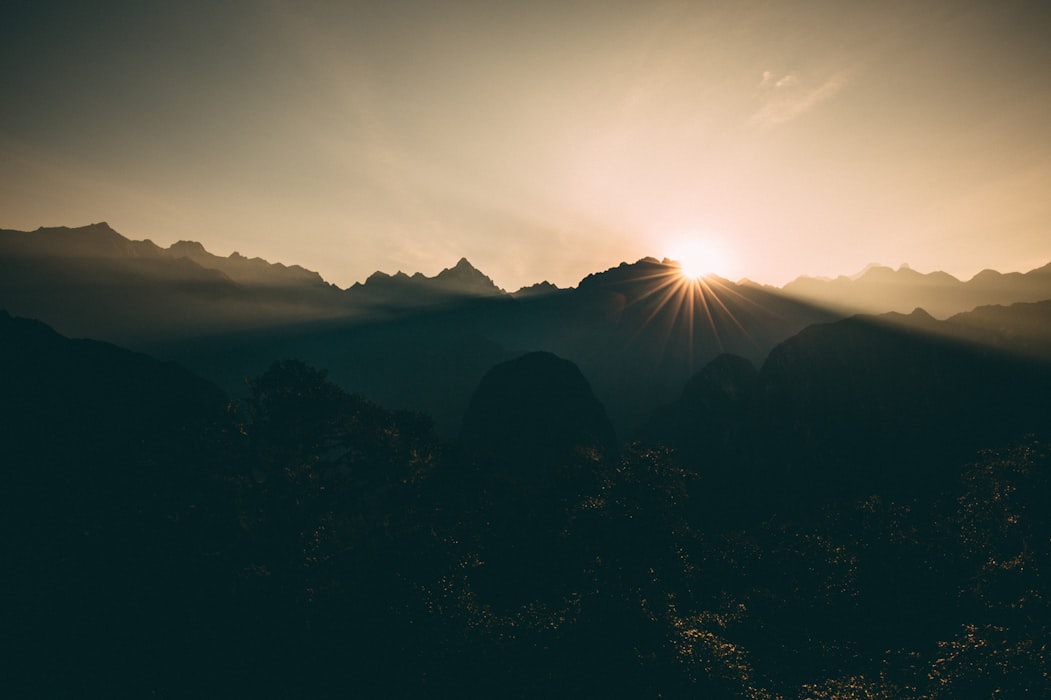
11. Sunrise Or Sunset
Some tips:
- Try to capture the moment where the sun peeks over the horizon or first come into sight
- Look for features which can help make your photo composition more interesting.
Examples:
Photography Ideas For Climbers And Life On The Mountains
12. Campsites And Tents
I love the look of campsites on a mountain. Brightly-colored tents spotting the mountainside often makes for a good photo.
If your campsite is particularly busy, it’s a great chance to capture the excitement and chaos.
And if it’s quiet, having just a few tents in your pictures is a good way to show the remoteness of where you are.
Examples:


13. Markers Or Symbols
Some mountains have flags or monuments to celebrate a milestone or in remembrance of certain events.
Some tips:
- Be respectful.
Examples:


14. Signposts
Signposts are great spots for taking group photos.
They are also useful reminders when you are looking back at old photos and cannot recall where some photos are taken!
Examples:

15. People And Lines
I don’t really enjoy climbing when the trails are packed with people. But they do make for some interesting photos.
Some tips:
- Look out for places where you can catch people lining up instead of just crowding together. Bonus if they are in some zigzag formation!
Examples:


16. People And Shadows
Shadows can create an interesting focal point in your pictures. Even more so if the background is clean and free of distractions.
Some tips:
- These are best taken in mid morning or mid afternoon when you can get harsher and longer shadows.
Examples:

17. People And Frames
Framing is a common photography technique to bring focus to the subject in a photo.
Examples:


18. Tiny People
I like how this reminds me of miniature photography.
Some tips:
- Your best shot (pun!) at this is either at a campsite or at the summit where there are more people gathering around.
Examples:

19. Footsteps
This can only be taken on sandy or snowy surfaces. Climbing on such soft surfaces is incredibly frustrating and exhausting. So make the most of it!
On the plus side, you can pretend that you are stopping to take a photo and not because you can’t catch your breath!
Some tips:
- Look for areas where there’s a neat line of footsteps. Avoid places where it looks like a mass of people stormed through.
Examples:

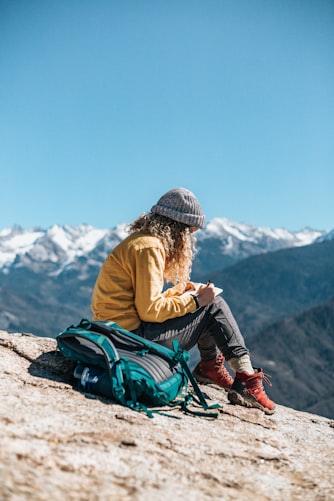
20. People On Their Downtime
It’s not all just action and fun
Keep your eyes for the quieter moments. I have seen people drawing and sketching the most amazing pictures that put my photos to shame.
Some tips:
- You probably wont find an artist on every climb but it’s pretty common to see people scribbling on a notebook.
Examples:

21. Love Is In The Air
Some tips:
- Avoid selfies which tend to block out the beautiful scenery around you. Invest in a small portable tripod.
Examples:

22. Photos Of Photographers
I’m always on a lookout for photographers.
Sometimes, looking at the things they are shooting may help me capture something I would have otherwise missed.
Sometimes, it’s just fun to take a photo of them in action. Photographers do end up in some of the most absurd places.
Examples:


23. Superheros
These are the porters who are usually carrying something twice their size. And yet somehow still climbing faster than you.
I have seen porters climb in their flimsy slippers and never lose their footing. I have even seen porters overtaking me while carrying a refrigerator.
Examples:

24. Locals
During your climb, you might notice that some mountains might be home to the local people.
This is a good opportunity to capture the lifestyle of people living in such a remote environment.
Some tips:
- It is probably a good idea to ask for permission before taking someone else’s photo.
Examples:

25. People Doing Crazy Things
Sometimes there are just crazy people doing crazy things on the mountains. They might be doing some extreme sports or some insane photoshoot.
Some tips:
- Make sure they are not doing anything unsafe. If they are, stop them instead of taking pictures!
Examples:

26. Wildlife
It’s usually quite difficult to encounter wildlife on a climb due to the high human traffic. You may have better luck if you are climbing in a less popular or more remote area.
Some tips:
- You may have better luck at the start of your climb. You may find more wildlife when you are at lower altitudes or passing through grasslands.
- You can also look out for tamed animals like donkeys. They are sometimes used to carry stuff up the mountains.
Examples:


27. Trees And Greenery
They say don’t miss the forest for the trees.
I say don’t miss the trees for the mountain. From the towering trees to the tiny leaves and weeds, there’s beauty in everything!
Examples:


Photography Ideas For Portraits
I tend to shy away from taking photos of myself during a climb. My face is either sweaty or oily. My hair is either too flat or too crazy. And generally, not showering for days is just not a good look.
But who wouldn’t like a nice photo of themselves? Why miss out on capturing some beautiful memories?
So here are some ideas you can try on your next climb:
28. You On A Ridiculously Huge Rock
Examples:
29. You On a Tall Rock
Examples:
30. You On The Edge
Being at the top of the world is a good look.
Some tips:
- Don’t do anything stupid for the sake of a good photo. Some photos look more dangerous than it really is because of a good angle. Or they have been photoshopped.
- Don’t give yourself a false of security! One strong gust of wind or a small slip on some rocks could knock you right over the edge.
- Don’t ignore warning signs. They are likely to have been placed there after an accident.
Examples:

31. You (Or Others) In Action
If you are not a fan of posed pictures, then keep an eye out for the action going on around you.
Some tips:
- Don’t stop even when you are taking a break. Take photos of people who are overtaking you during this time.
- Pick a photo buddy to help take candid photos of each other during the climb. Let your buddy know if you would like them to capture specific moments (e.g. during a steep climb or when you are making the final push to the summit). Remember to ask them for theirs as well!
Examples:

32. Jumpshots
Some tips:
- To make your jumps look higher, bend your knees and pull your feet back towards your butt when leaping into the air.
Examples:


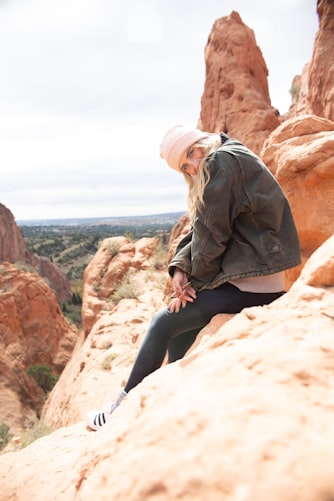
33. You Staring Contemplatively Into The Horizon
This is possibly a photo idea that has been done to death.
But wouldn’t you still want a photo of yourself doing just that? And there’s no better backdrop than what you can find on a climb.
Some tips:
- This is best taken from higher grounds. Find a high point where you can look out for miles without anything blocking your views.
Examples:


34. Half Your Face
Some tips:
- Use things like hats to cover parts of your face or simply turn sideways
Examples:

35. Reverse Headshot
Sadly, I cannot rock an awesome grunge look. I often end up deleting most of the unflattering head shots take of me.
Perhaps I will try a reverse head shot the next time around.
Some tips:
- Find a nice, clean background that’s not distracting. This can be a straight road on your trail or the horizon.
- Try to make your hair look presentable. Tie it up or sweep it into a cap if you have to.
- Avoid harsh direct sunlight which could make your hair look greasy.
Examples:


36. Reverse Full Body Shot
If you are still not comfortable with a closeup, then zoom out further! It’s also a good chance to capture your huge heavy backpack.
Examples:
37. Silhouette
An alternative to the reverse full body shot will be to take a silhouette picture instead.
Some tips:
- The person in the photo should be standing against the sun. The focus has to be on the brighter areas in the frame so that everything else will be darkened in the photo.
Examples:


38. A Tiny You
Seeing how tiny you are is a great reminder of how you conquered that monster peak of a mountain.
But unless you have some good photo spots near your campsite, it may be quite difficult to take this photo.
It is probably easier to take a picture of some random tiny person instead.
Some tips:
- Look for good photos spots around your campsite. Here you can wander around without worrying about holding up the group.
- Sometimes, your climbing group may end up being separated into a “faster” and “slower” group. This is a good chance to take these tiny pictures for one another.
Examples:


39. Your Feet
“Having the world at your feet.”
“Kick back and relax.”
Pick an awesome background to snap a photo of your feet. The captions practically write themselves!
Examples:

40. Your Gear
On days when I want to personalize a photo without actually being in it, I like to use my gear and equipment as props.
I like to also think of them as my little buddies that have accompanied me through the climb. These can be your boots, walking sticks, backpacks, ice
Some tips:
- A shot of everyone’s equipment can also make for a good photo. Line up everyone’s backpacks or walking sticks when you are taking a break!
Examples:

Basic Photography Hacks
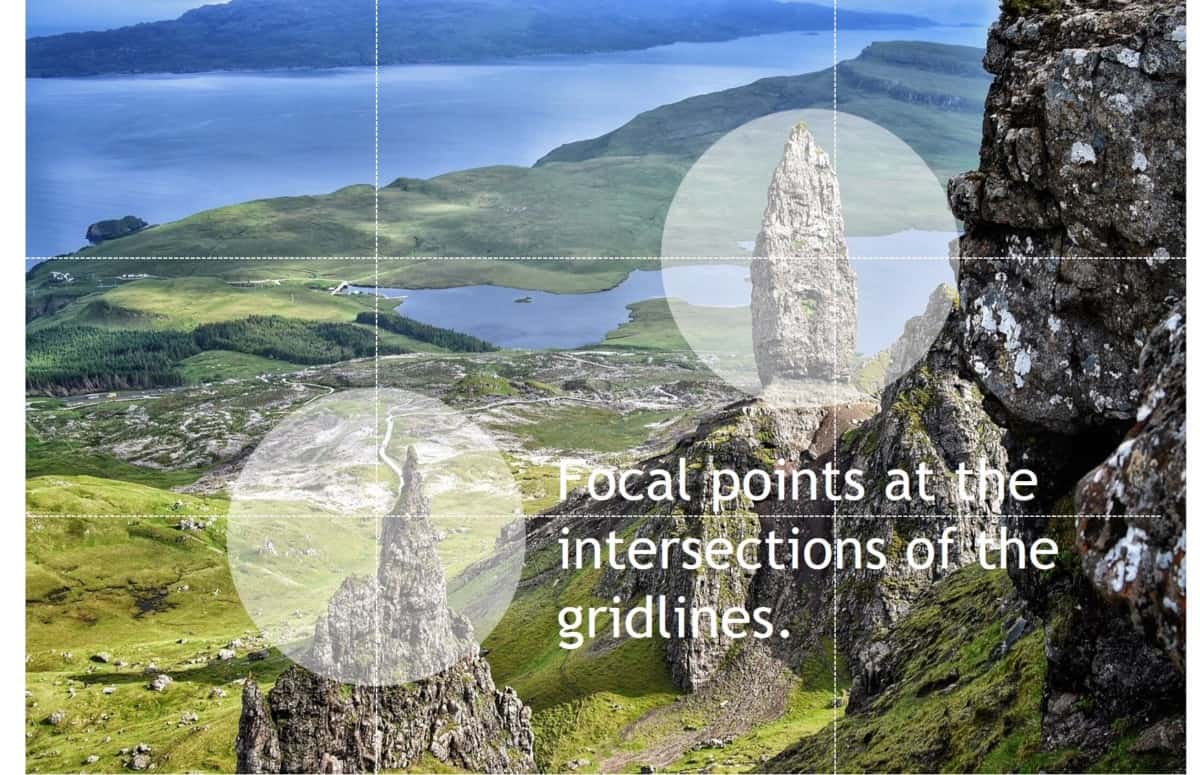
Use The Rules Of Thirds
- Imagine your photo being broken up into grids of 9 by 2 evenly spaced vertical lines and 2 evenly spaced horizon lines.
- There will be 4 points on your photo where the 2 vertical lines and 2 horizon lines intersect.
- The rules of thirds specify that the focal point of your photo (i.e. the most interesting thing in your photo) should be located at any of these 4 points.
Here is an example:
Most (if not all) cameras and phones allow you to overlay the grid lines when taking photos.
If you cannot find the function, just Google “how to enable camera grid on [your phone or camera]”.
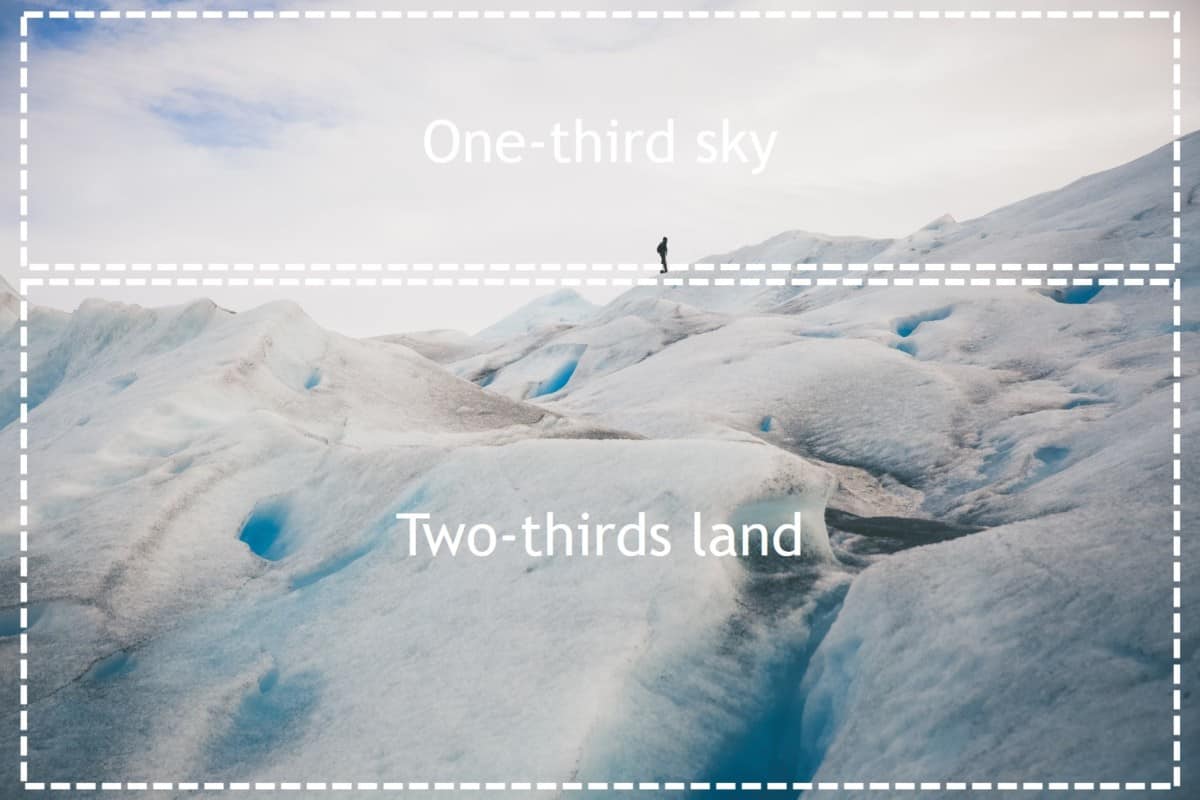
Use The Two-third And One-third Rule
When taking photos that have 2 clear distinct areas (e.g. the mountain and the sky), do not split them into halves. Instead, split the image into two-thirds and
For instance, if you are shooting a picture of the mountain peak against the sky, the mountain should take up one-third of the photo. The sky should take up the other two-thirds (or vice versa).
Here is an example:
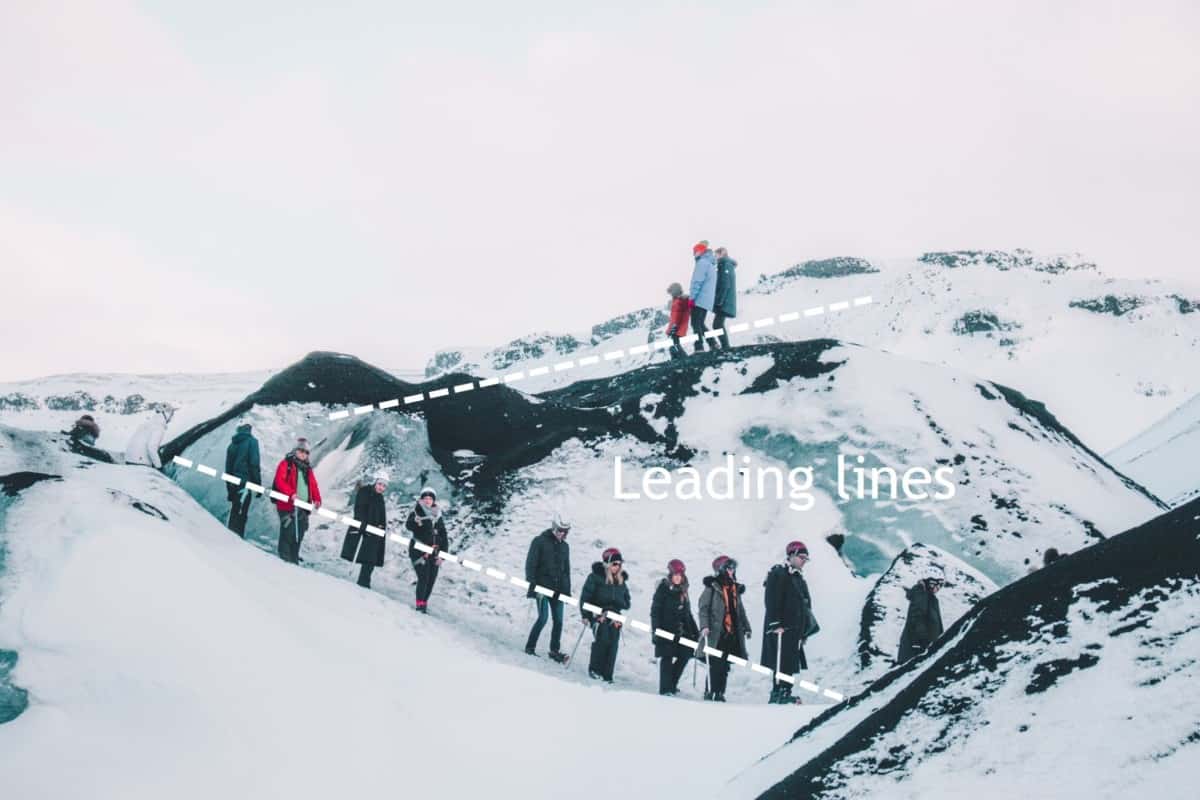
Use Leading Lines
Leading lines are clear distinct lines in your photos that
Some of the photo ideas above make sure of this technique e.g. people lining up, footsteps in the sand or snow
Here is an example:
Break the Rules
These are just some general guidelines on composing better pictures. But you see plenty of amazing photos around that break these rules.
Just have fun and enjoy the process!
Safety When Taking Photos
I have mentioned this quite a few times throughout this post but it is worth another reminder.
DO NOT BE ANOTHER FREAK ACCIDENT VICTIM. Death by selfie is apparently a thing.
It is easy to get carried away when taking a selfie. People are more focused on how they look on the screen instead of where they are going.
What to do when taking selfies:
- ALWAYS make a verbal warning to the group. Just a simple “hey, be careful of the edge” or “guys, don’t step back too far” can help draw everyone’s attention to the dangers around you.
- Don’t get too close to a dangerous spot.
- Put down your stuff. Sometimes you may not be aware of the space that your backpacks or walking sticks are taking up. You may accidentally push people down when you are moving around.
And it’s not just selfies. Sometimes it might be tempting to climb up to a ledge and an inaccessible corner to get that perfect shot.
What to do when taking photos:
- Don’t put yourself in a dangerous situation. If you happen to drop your camera or phone, your first instinct will be to try and grab them. The next thing you know, you could be falling off as well.
- Get someone to keep a lookout for you.
- Never break off from the group without telling anyone.
- Don’t hold up traffic. Let people pass wherever possible and don’t stop on narrow paths.