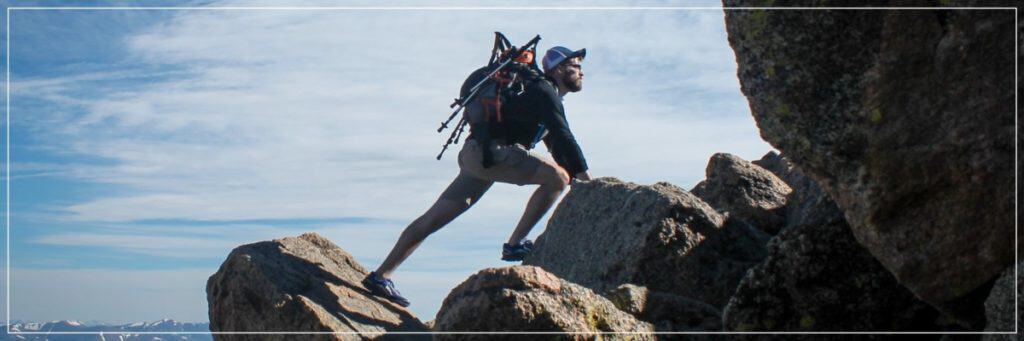
I have recently decided that I want to try out a more “serious” form of mountain climbing. I wanted to go beyond my regular hiking and trekking. So I decided to learn more about technical climbing and mountaineering.
But as I was figuring out the gear and equipment I need, it became a bit overwhelming. When do I need a piece of certain equipment or tool? Why are there so many variations and how do I know which one I need?
So if you are struggling with these same issues, I hope this article can help you out. I have summarized the research I did into a series of comparison tables. This can give you a quick overview of the equipment you need to climb a mountain
What Type Of Mountain Climbing Will You Be Doing?
Climbing a mountain is a very broad term that can mean many different things.
Before we can figure out the equipment we need, it is useful to look at the different types of mountain climbing. Each of them will need different specialized climbing tools.
There are many different categories and types of mountain climbing. For the purpose of this article, I will simplify them into the following broad categories:
- Rock climbing: this means using your hands and feet to climb up a vertical rock surface. May not include an ascent to the summit of a mountain.
- Ice climbing: this means using your hands and feet to climb up a vertical rock surface. May not include an ascent to the summit of a mountain.
- Mountaineering: climbing with the goal of reaching the summit of a mountain. May includes rock climbing or ice climbing or both. Mountaineering may sometimes be non technical and no extra equipment is required.
Read: What Is Non Technical Climbing?
List of Climbing Equipment
- Hiking Sticks or Poles
- Hiking Shoes or Boots
- Crampons
- Rock Climbing Shoes
- Climbing Helmet
- Climbing Harness
- Ice Axe and Ice Tool
- Ice Screws and Pitons
- Snow Anchor
- Climbing Ropes
- Belay Device
- Pulley (a.k.a. Ascender, Descender)
- Carabiner
- Quickdraw
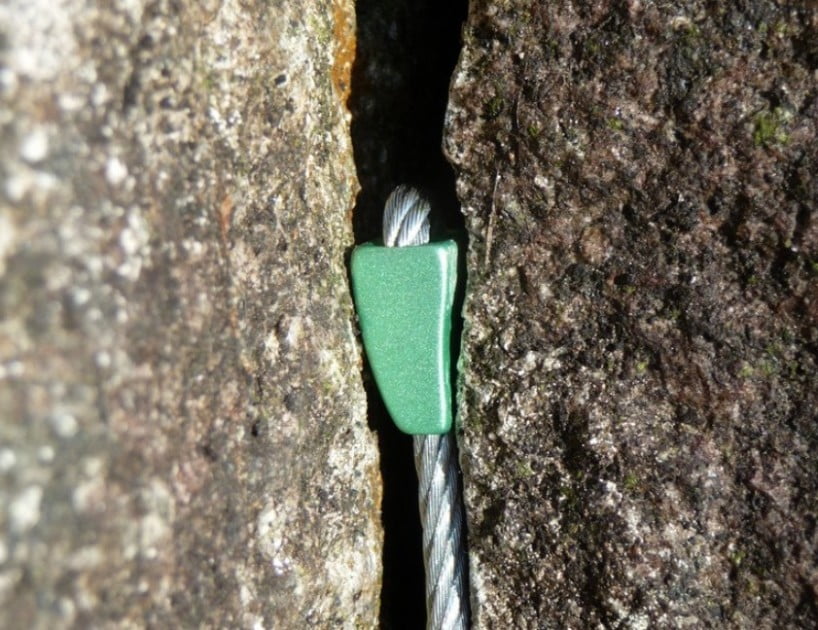
- Nut (a.k.a. Passive Protection Gear)
- Cam (a.k.a. Active Protection Gear)
- Avalanche Transceiver
- Snow Probe
- Snow Shovel
| If you are new to mountain climbing, check out these helpful guides: – How To Start Mountain Climbing Today: 10 Simple Steps – What Are The Dangers Of Mountain Climbing: 15 Potential Hazards – Why Go Mountain Climbing: 25 Things To Do At The Summit – What Is The Difference Between Mountaineering And Alpine Climbing? |
1. Hiking Sticks or Poles

You need hiking sticks or poles for:
- Mountaineering
How to choose the type of hiking sticks or poles:
| Quantity | Depending on your preference, you can use 1 or 2 hiking sticks. |
| Shaft Material | Aluminum is durable and less costly. Carbon composite is lighter, less durable and more costly. Wooden sticks are cheap but do not come with any of the features mentioned here. |
| Grip Material | Cork and foam are useful for sweaty hands. Rubber is a better insulator for cold temperatures. But you may get blisters if you have sweaty hands. |
| Length | Some sticks have adjustable lengths. This is useful as you use different lengths when going uphill and downhill. Highly recommended to get sticks with adjustable lengths. |
| Locking mechanism | Sticks with adjustable lengths have different locking mechanisms. Look for one that you are comfortable with. |
| Shock absorption | Some sticks have shock absorption capability. This helps support your hips and legs when going downhill. |
| Tip | A sharp tip is useful to get traction on trails and icy surfaces. A rubber tip is useful on hard surfaces (e.g. rocks). This protects your stick and the environment. Some hiking sticks come with both a sharp tip and a rubber cover that you can use interchangeably. |
| Wrist straps | Straps help to support your hands when gripping. Some sticks have straps that may be for right or left hands only. |
Things to look out for:
- To adjust your hiking sticks to the correct length, hold the grip and bend your elbow at 90 degrees. The tip should be just touching the ground.
Typical lifespan:
- Can last forever.
Average cost:
- USD 20 to USD 40 for a mid-range option.
2. Hiking Shoes or Boots

You need hiking shoes or boots for:
- Ice climbing
- Mountaineering
How to choose the type of footwear:
| Hiking Shoes | Hiking Boots | Mountaineering Boots | |
| Suitable for | Hiking | Mountaineering (short trips) | Ice climbingMountaineering |
| Height | Low cut | Mid to high cut | High cut |
| Ankle support | Poor | Good | Excellent |
| Sole stiffness | Flexible | Stiffer | Stiffest |
| Break in time | Short | Short | Long |
| Insulation | Uncommon | Uncommon | Common |
| Comfort | Comfortable | Comfortable | Less comfortable |
| Boot rating | – | B0 or B1 | B2 or B3 |
| Compatibility with crampons | Unlikely to be compatible | B0: unlikely to be compatible. B1: compatible with C1 rated crampons. | B2: compatible with C2 rated crampons. B3: compatible with C3 rated crampons. |
How to choose the material of the footwear:
| Leather | Synthetics | Waterproof membrane | |
| Weight | Heavier | Lighter | Lighter |
| Breathability | Not very breathable | Breathable | Not very breathable |
| Break in time | Long | Shorter | Shorter |
| Durability | Good | Less durable | Good |
| Cost | More costly | Less costly | More costly |
| Water resistance | Good | Depends | Excellent |
Things to look out for:
- If your mountaineering trip also includes rock climbing, you will need to bring along your rock climbing shoes (see number 3)
- If you need crampons, always bring your boots along to test out the compatibility between the 2. Not all boots are compatible with crampons.
- Hiking shoes or boots are more comfortable with thicker socks. Check that your shoes or boots has sufficient space for a thick pair of socks. Bring your socks along when trying the boots out.
Typical lifespan:
- 5 to 10 years.
- Boots actually last longer if you wear them regularly. If you have not worn a pair of shoes or boots for a while, check for tears and cracks. Many old shoes and boots give out in the middle of a climb.
Average cost:
- USD 60 to USD 100 for a mid-range pair of hiking shoes or hiking boots.
- USD 100 to USD 150 for a mid-range pair of mountaineering boots.
Accessories you may also need:
- Gaitors: to prevent small debris from falling into your shoes or boots.
- Heated insoles: for climbing in cold temperatures
3. Crampons

Crampons are spikes that you attach to your hiking boots for walking or climbing in icy terrains.
Read: Can You Bring Crampons In A Carry-On?
You need crampons for:
- Ice climbing
- Mountaineering in icy conditions
How to choose the type of crampons:
| Strap-on | Hybrid | Step-in | |
| Suitable for | Walking on icy, generally flat routes. | Ice climbing Mountaineering | Ice climbing Mountaineering |
| Crampon rating | C1 | C2 | C3 |
| Stiffness | Most flexible | Stiffer | Very stiff |
| Requirements | Can be easily secured with most boots | Might require boots with stiff soles. Requires the boots to have heel welts for it to be properly secured. | Require boots with very stiff soles. Most require the boots to have toe and heel welts for it to be properly secured. |
Other things to look out for:
- Always bring your boots along to test out the compatibility between the 2.
Typical lifespan:
- 5 to 10 years for sporadic use e.g. once a year
- 3 to 5 years for regular use e.g. multiple times a year
- Climbing on tougher terrains and more challenging conditions will reduce the lifespan of the crampons.
Average cost:
- USD 100 to USD 150 for a mid-range option.
Accessories you may also need:
- Storage bags or covers: to cover the sharp ends of your crampons and prevent them from damaging your other gear
- Anti-balling plate: to prevent snow from sticking to the bottom of the crampons.
- Gaitors: to protect your lower legs from getting cut by the crampons.
- Center bar: to adjust the flexibility or extend the length of the crampons
- Spare parts: to make repairs e.g. screws, center bars
4. Rock Climbing Shoes
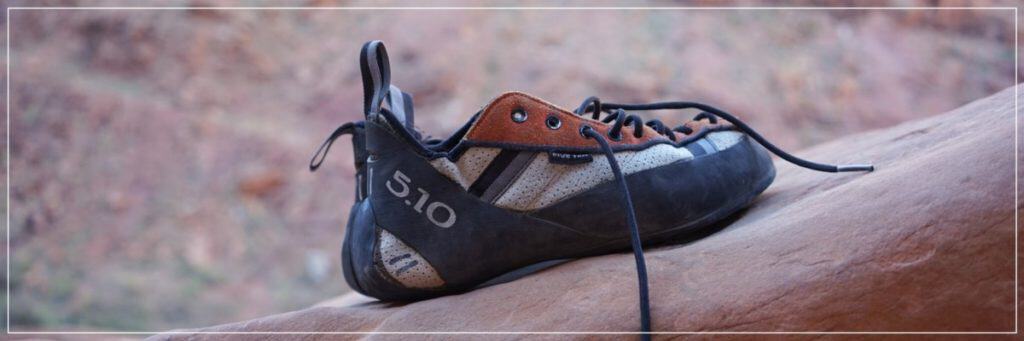
Rock climbing shoes are needed for:
- Rock climbing
How to choose the type of rock climbing shoes:
| Flat | Slightly downturned | Aggressively downturned | |
| Comfort | Comfortable | Not as comfortable | Least comfortable |
| Soles | Thick rubber soles. Good support but reduce your sensitivity to the feel of the rocks. | Thinner soles. Less support but gives you a better grip and feel of the rocks. | Thinner soles. Less support but gives you a better grip and feel of the rocks. |
| Suitable for | Long climbs Less challenging routes | Long climbs Moderately challenging routes | Short climbs Challenging routes |
| Durability of the sole | Durable | Not as durable | Not as durable |
| Cost | Less costly | More costly | More costly |
How to choose the material of rock climbing shoes:
| Unlined Leather | Lined Leather | Synthetics | |
| Stretch over time | Stretches the most. Can increase by 1 shoe size over time. | Stretches a little. Can increase by ½ a shoe size over time. | Does not stretch |
| Smell over time | Not so smelly | Not so smelly | Smelly |
| Durability | Less durable | Less durable | Durable |
| Breathability | Most breathable | Breathable | Not breathable |
| Comfort | Less comfortable | More comfortable | Less comfortable |
Other things to look out for:
- Unlike regular shoes, you should choose your rock climbing shoes to fit quite snugly. This gives you a better climb performance.
- Rock climbing shoes are usually worn without any socks. If you need socks for colder climbs, bring your socks along when trying the shoes out.
- You have to try on the shoes before buying. Different brands and designs are all going to fit differently even for the same sizes.
- Rock climbing shoes with laces are suitable for long and short climbs. Those with velcro straps or plain slip-ons are suitable only for short climbs. They are convenient to take off between climbs but may become loose during longer climbs.
- There are some climbing shoes specially designed for women and kids. These shoes have slightly different proportions from the regular rock climbing shoes.
Typical lifespan:
- 1 to 2 years for regular use e.g. one or twice a week
Average cost:
- Flat: USD 50 to USD 80 for a mid-range option.
- Slightly downturned: USD 120 to USD 150 for a mid-range option.
- Aggressively downturned: USD 120 to USD 150 for a mid-range option.
Accessories you may also need:
- Chalk bag and chalk: to prevent slippery and sweaty palms
- Climbing tape: to protect hands and fingers from cuts
5. Climbing Helmet
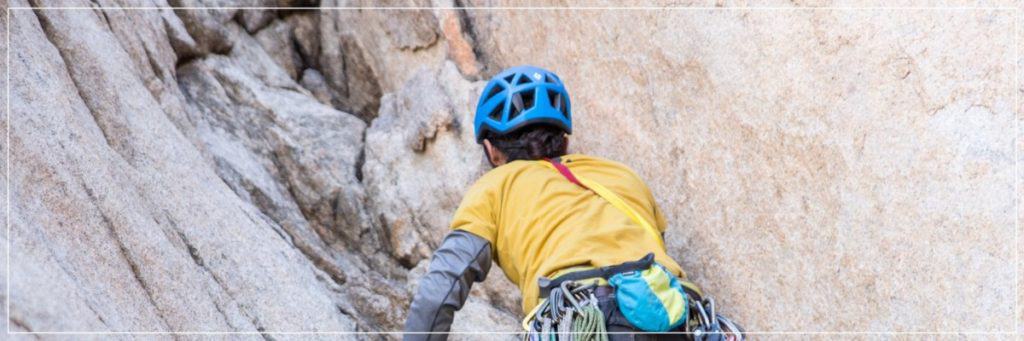
You need helmets for:
- Rock climbing
- Ice climbing
- Mountaineering
How to choose the type of climbing helmet:
| Hardshell Helmet | Shelled Foam Helmet | |
| Suitable for | Rock climbing | Rock climbing Ice climbing Mountaineering |
| Design | Hard outer shell + thin inner foam | Thin outer shell + thick inner foam |
| Weight | Heavier | Light |
| Ventilation | Poor | Good |
| Durability | More durable | Less durable |
| Cost | Less costly | More costly |
Things to look out for:
- Check if it is easy to adjust the fit of the helmet when you are wearing it.
- Check if the helmets have clips to secure your headlamps
Typical lifespan:
- Can last up to 10 years or more.
- However, you must replace your helmet when it’s damaged e.g. cracks, dents, broken or torn parts, deformed foam.
- It is also a good idea to replace your helmet after a huge impact even if there is no visible damage.
Average cost:
- USD 40 to USD 80 for a mid-range option.
Accessories you may also need:
- Neck shade: to protect your neck from the sun
6. Climbing Harness
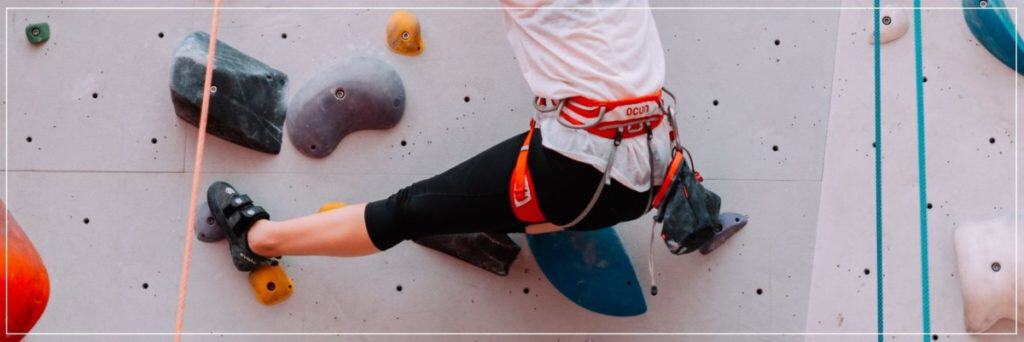
You need harnesses for:
- Rock climbing
- Ice climbing
- Mountaineering
How to choose the type of climbing harness :
| Rock Climbing Harness | Ice Climbing Harness | Mountaineering Harness | |
| Leg loops | Adjustable | Adjustable | Adjustable |
| Number of gear loops (to hang climbing gear) | More than 4 | More than 4 | 4 or less. |
| Belay loop | Typically quite thick | Typically quite thick | Typically a thin loop or not provided. |
| Padding | Thick padding around the waist | Thick padding around the waist | No extra padding |
| Size | Bulkier | Bulkier | Less bulky |
| Weight | Heavier | Heavier | Light |
| Suitable for winter conditions | No | Yes | Yes |
Things to look out for:
- It is good to try on the harness on an actual climb to ensure it’s comfortable and does not bite into any parts of your body. You can try on harnesses at climbing gyms or borrowing a set from someone for a climb.
- There are some harnesses specially designed for women and kids. These have slightly different proportions from the regular harnesses.
Typical lifespan:
- Can last up to 7 years or more.
- However, you should replace your harness when there are damages e.g. rips or frays, damaged buckles, excessive abrasion
Average cost:
- USD 40 to USD 60 for a mid-range option.
Accessories you may also need:
- Extensions to attach other equipment or items
7. Ice Axe and Ice Tool

An ice axe is a multi-purpose tool which can be used for hiking, ascending and descending of routes with snowy or icy conditions. It is used mainly to help with balance and as a safety tool.
An ice tool is a specialized form of ice axe that’s used for vertical ice climbing.
You find out more about the difference between an ice axe and ice tool here.
You need ice axes for:
- Ice climbing
- Mountaineering
You need ice tools for ice climbing.
How to choose the type of:
| Ice Axe | Ice Tool | |
| Suitable for | Mountaineering (on flatter routes) | Ice climbing Mountaineering (on steeper routes) |
| Length | Longer. Ranges from 20 to 30 inches (50 to 75 centimeters) | Shorter. Ranges from 17 to 21 inches (45 to 55 centimeters) |
| Curvature of the head | Less curved, almost straight | More curved. |
| Quantity | One climber typically uses one ice axe | One climber typically uses two ice tools, one on each hand |
| Rating | Can be rated Basic (B) or Technical (T) | Rated Technical (T) |
| Cost | Less costly | More costly |
Other things to look out for:
- The head of the ice axe or ice tools sometimes comes with a hammer on one end.
Typical lifespan:
- 5 to 10 years for sporadic use e.g. once a year
- 3 to 5 years for regular use e.g. multiple times a year
- Improper usage of the ice axe or ice tools will reduce the lifespan of the crampons.
Average cost:
- Ice axe: USD 100 to USD 150 for a mid-range option.
- Ice tool: USD 120 to USD 180 for a mid-range option.
Accessories you may also need:
- Ice tool holster: an attachment to your harness to hold an ice axe or ice tool
- Storage bags or covers: to cover the sharp ends of your ice axe or ice tool and prevent them from damaging your other gear
- Leashes: to prevent your ice axe or tool from dropping.
- Grips: to improve the grip on an ice axe when used as a walking stick
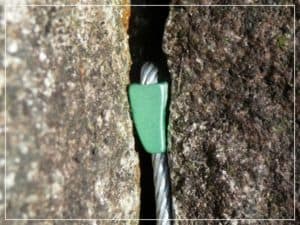
8. Ice Screws and Pitons
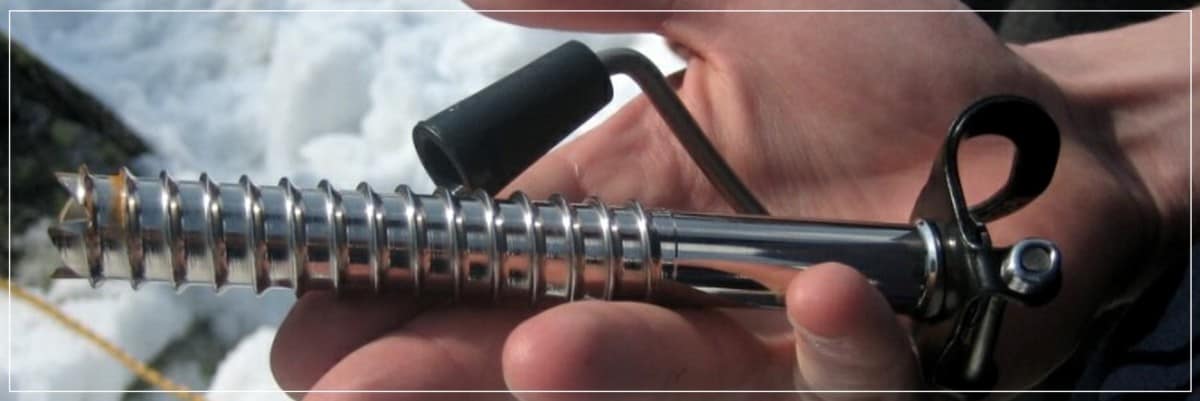
Ice screws and pitons are large screws and spikes. They are used to screw into hard ice and act as a temporary anchor point for protection
You need ice screws and pitons for:
- Ice climbing
- Mountaineering
How to choose the type of:
| Ice screw | Ice pitons | |
| Design | Tubular and threaded | Tubular and threaded Sharp and unthreaded |
| Suitable for | Most scenarios | Thin ice or easily fractured ice |
How to choose the length:
| Short | Medium | Long | |
| Length | 10 to 13 centimeters | 16 to 17 centimeters | 19 to 22 centimeters |
| Suitable | Thinner ice with rock underneath | Most common length. Stronger than the shorter screws. | Strongest length. Useful when the top surface of the ice is weak and hard ice is found deeper in. |
Other things to look out for:
- Check that the ice screws are easy to place and remove even with your gloves on.
Typical lifespan:
- Can last up to 10 years or more.
- However, you should replace your ice screws when there are damages e.g. worn out threads, corrosion, bents, cracks
- It is also a good idea to replace your ice screws after a huge impact (e.g. large falls) or dropped from a huge distance. This is even if there is no visible damage.
Quantity needed:
- 8 to 15 pieces per person.
- You can share these with other climbers.
Average cost:
- USD 40 to USD 60 for a mid-range option.
Accessories you may also need:
- Ice screw clips: a special form of a carabiner to secure your ice screws to your harness
- Storage bags or covers: to cover the sharp ends of your ice screws and prevent them from damaging your other gear
9. Snow Anchor
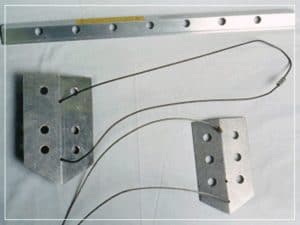
Snow anchors are used to set up an anchor point for belay, rappelling or rescue work.
You need snow anchors for:
- Ice climbing
- Mountaineering in icy conditions
How to choose the type of snow anchors:
| Picket | Fluke | |
| Suitable for | Firmer snow | Deep, soft snow |
Other things to look out for:
- Depending on the situation and climber’s experience, other equipment such as an ice axe can sometimes also be used as a snow anchor
Typical lifespan:
- Can last up to 10 years or more.
- However, you should replace your snow anchors when there are damages e.g. corrosion, bents, cracks
- It is also a good idea to replace your snow anchors after a huge impact (e.g. large falls) or dropped from a huge distance. This is even if there is no visible damage.
Quantity needed:
- Depends on the climb
Average cost:
- USD 20 to USD 30 for a mid-range option.
Accessories you may also need:
- Storage bags or covers: to cover the sharp ends of your snow anchors and prevent them from damaging your other gear
10. Climbing Ropes
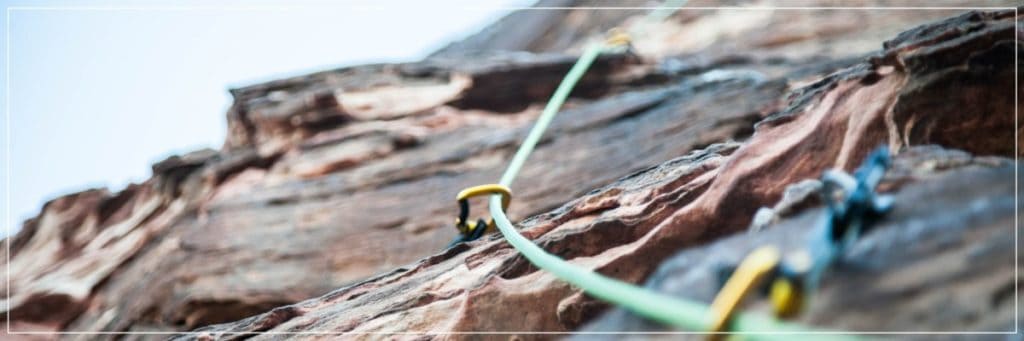
Climbing ropes are used to:
- Ensure a climber’s safety when they are climbing up vertical surfaces
- Ensure a climber’s safety when they are traveling on terrains with risks of falling
- Carry out rescue activities
- Transport equipment
Ropes are needed for:
- Rock climbing
- Ice climbing
- Mountaineering
How to choose the type of climbing rope:
| Dynamic Single Rope | Dynamic Half Rope | Dynamic Twin Rope | Static Rope | |
| Suitable for | Rock climbing | Rock climbing Ice climbing Mountaineering | Rock climbing Ice climbing Mountaineering | For making rescues or transport equipment. NOT to be used for climbing since the rope doesn’t stretch to absorb any impact. |
| Number of ropes required | 1 | 2 | 2 | 1 |
| Ease of use | Easier to use than a two rope system. | More challenging to use for belayer and climber. | More challenging to use for belayer and climber. | – |
| Weight | Weight of 1 rope. | Heavier since 2 ropes are required. | Heavier since 2 ropes are required. Usually lighter than half ropes. | Weight of 1 rope. |
| Redundancy | No redundancy. | Safe even if one rope fails. | Safe even if one rope fails. | – |
| Suitability for wandering routes | Not suitable due to more rope drag. | Suitable due to less rope drag. | Not suitable due to more rope drag. | – |
| Typical diameter | 9mm to 11mm | 8mm to 9mm | 7mm to 8mm | 9mm to 13mm |
| Variation | Some single ropes may also be used as a half or a twin rope system. Check the ratings. | Some half ropes may also be used as a single or a twin rope system. Check the ratings. | Some half ropes may also be used as a single or a half rope system. Check the ratings. | – |
| Compatibility | – | Keep to a matching pair. | Keep to a matching pair. | – |
| How to identify | Look out for a circle with the number ‘1’ marked at either end of the rope. | Look out for a circle with the symbol ‘½’ marked at either end of the rope. | Look out for a circle with the infinity symbol ‘∞’ marked at either end of the rope. | No rating is given. |
How to choose the diameter of the climbing rope:
| Thinner Rope (less than 9.5mm) | Thicker Rope (9.5mm and above) | |
| Suitable for | Mountaineering | Rock climbing Ice climbing |
| Ease of use | Require more experience or skills to belay with. May slide through a belay device very quickly when a climber falls. | Easier to use. |
| Weight per foot/ meter | Lighter. | Heavier. |
| Durability | Less durable | More durable |
How to choose the length of the climbing rope:
| Dynamic Rope | Static Rope | |
| Typical length | 100 foot to 260 foot(30 meters to 80 meters) | Sold by the foot or meter. |
| How to choose the correct length | The length should be more than twice of the height of the tallest route you will be climbing (e.g. if you are climbing a 100 feet wall, your rope should be longer than 200 feet). | Depends on requirements. |
Things to look out for:
- Dry treatment: A dry rope is one that is treated to increase water resistance. This is useful for mountaineering and ice climbing when you are exposed to wet weather or winter conditions. Dry ropes are usually more costly.
- Check that the ropes have a colored band to highlight the middle and the end of the ropes.
Typical lifespan:
- Can last up to 10 years or more.
- 7 years with infrequent usage (once or twice a year)
- 4 to 5 years with regular usage (one a month)
- 1 to 3 years with frequent usage (a few times a month)
- However, you should replace your ropes when there are damages e.g. cuts, frays, stiffness, flattened portions
- It is also a good idea to replace your ropes after a huge impact (e.g. large falls with heavy loads). This is even if there is no visible damage.
Quantity needed:
- Depends on the climb
Average cost:
- USD 100 to USD 150 for a mid-range option.
Accessories you may also need:
- Storage bag or wrap: to store the ropes
- Rope protector: to prevent wear and tear
11. Belay Device
A belay device is used to control the rope during belaying. It reduces the effort needed by the person doing the belaying.
You need belay devices for:
- Rock climbing
- Ice climbing
- Mountaineering
How to choose the type of belay device:
| Figure 8 Belay Device | Tubular Belay Device | Passive Assisted Braking Belay Device | Active Assisted Braking Belay Device | |
| Suitable for | Mainly for rescue and rappelling. | Rock climbing Ice climbing Mountaineering | Rock climbing Ice climbing Mountaineering | Rock climbing |
| Rope Compatibility | Can be used for most rope diameters. | Work with two strands of rope. Can be used for most rope diameters. Can accommodate single or double ropes. | Work with two strands of rope. Can be used only for some rope diameters (depends on manufacturer). | Work with a single strand of rope. Does not work well with wet or icy ropes. |
| Ease of use | Requires more attention and strength from the belayer. | Easy to control. | Requires less strength from the belayer. Helps the belayer to catch a fall | Requires less strength from the belayer. Helps the belayer to catch a fall |
| Weight | Light | Light | Light | Heavier |
| Rappelling | Smooth and efficient rappelling. | Can be used for rappelling but might be slow. | Can be used for rappelling but might be difficult due to the braking mechanism. | Cannot be used to rappel. |
| Cost | Less costly | More costly | More costly | More costly |
Typical lifespan:
- Can last forever.
- Check for any damages before using e.g. corrosion, malfunctioning mechanism, bent components
Quantity needed:
- 1 per person.
Average cost:
- Tubular or assisted braking: USD 20 to USD 30 for a mid-range option.
- Figure 8: USD12 to USD 20 for a mid-range option.
12. Pulley (a.k.a. Ascender, Descender)
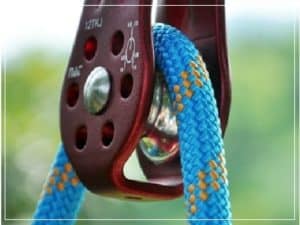
Pulleys are used to:
- Transport gear and equipment up a vertical surface.
- Carry out crevasse rescue or self-rescue in the event of someone falling into a crevice or crevasse
You need pulleys for:
- Rock climbing
- Ice climbing
- Mountaineering
How to choose the type of pulleys:
| Size | A larger pulley can carry a larger load. But they are also heavier. |
| Material | Typically made of aluminum or stainless steel. Plastic ones are cheaper but less durable. |
| Rope size | Check that the pulley can accommodate the diameters of the ropes being used. |
| Purpose | Some pulleys are used for climbing. Some are only used for transporting loads. |
| Strength | All pulleys have a maximum weight that they can handle. |
| Prusik pulley | Prusik pulleys are a type of pulley designed to prevent a prusik friction knot from jamming in the mechanism. |
| Swivel pulley | The swivel mechanism prevents ropes from twisting. |
Other things to look out for:
- There are many types of pulleys for different purposes. Speak to experienced climbers to find out which ones are suitable for your climb.
Typical lifespan:
- Can last forever.
- Check for any damages before using e.g. corrosion, malfunctioning mechanism, bent components
Quantity needed:
- Depends on the climb.
Average cost: USD 30 to USD 50 for a mid-range option.
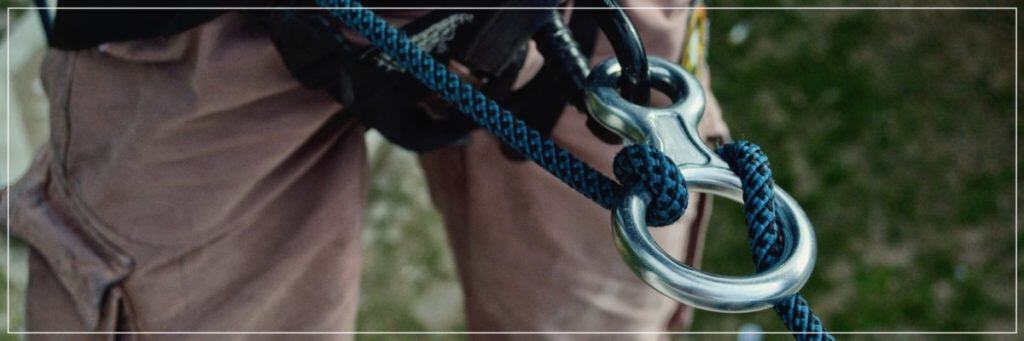
13. Carabiner
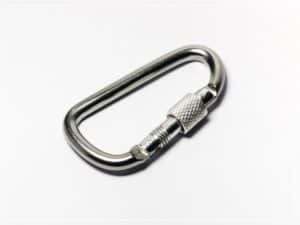
You need carabiners for:
- Rock climbing
- Ice climbing
- Mountaineering
How to choose the type of carabiner shape:
| Oval Shape | D Shape | Asymmetric D Shape | Pear Shape | |
| Suitable for | Rock climbing Ice climbing Mountaineering Rappelling | Rock climbing Ice climbing Mountaineering | Rock climbing Ice climbing Mountaineering | Mainly used for belaying and rappelling |
| Cost | Less expensive | Expensive | Most expensive | Expensive |
| Strength | Not as strong as the rest | Strongest | Not as strong as D shape | Not as strong as D shape and asymmetric D shape |
| Weight | Heaviest | Heavy | Light | Heavy |
| Gate opening | Smallest | Small | Large | Large |
How to choose the type of carabiner gate:
| Straight Gate | Bent Gate | Wiregate | |
| Durability | Durable | Durable | Less durable |
| Weight | Heavy | Heavy | Light |
| Use in cold conditions | Might freeze shut | Might freeze shut | Less likely to freeze shut |
| Gate opening | Smaller | Smaller | Large |
| Locking mechanism | Comes in both options — with and without a locking mechanism | Comes in both options — with and without a locking mechanism | Does not have a locking mechanism |
Other things to look out for:
.
- Always use carabiners with a locking mechanism for a belay device. Though a locking carabiner is heavier, it is more secure.
Typical lifespan:
- Can last for up to 10 years or more.
- However, you must replace your carabiners when it’s damaged e.g. cracks, corrosion, excessive wear and tear, missing screws, malfunctioning gates or locking mechanism.
- It is also a good idea to replace your carabiners if they have been dropped from a huge distance.
Quantity needed:
- 3 to 4 locking carabiners per person.
- 20 to 30 non-locking carabiners per person.
- You can share these with other climbers.
Average cost:
- USD 5 to USD 10 for a mid-range option.
14. Quickdraw
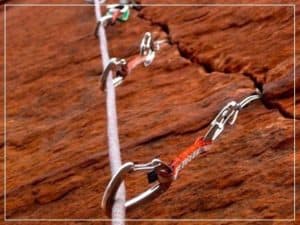
A quickdraw is used to attach climbing ropes to anchor points.
You need quickdraws for:
- Rock climbing
- Ice climbing
- Mountaineering
How to choose the type of carabiner for the quickdraw:
| Straight Gate | Bent Gate | Wiregate | |
| Durability | Durable | Durable | Less durable |
| Weight | Heavy | Heavy | Light |
| Use in cold conditions | Might freeze shut | Might freeze shut | Less likely to freeze shut |
| Gate opening | Smaller | Smaller | Large |
| Suitable for | Either end | Rope end of the quickdraw | Either end |
A quickdraw uses 2 carabiners — one at each end. A quickdraw can have a combination of carabiners with different gate types.
How to choose the sling length of the quickdraw:
| Short | Medium | Long | |
| Suitable for | Rock climbing | Rock climbing (longer or wandering routes) | Ice climbing Mountaineering |
| Rope drag | More drag | Lesser drag | Least drag |
| Weight | Lighter | Light | Heavy |
| Typical length | 10 — 12 centimeters | 17 — 18 centimeters | 60 centimeters (this is looped and can be extended as required) |
Other things to look out for:
- You can make your own quickdraw and customize the required length.
Typical lifespan:
- Can last up to 10 years or more.
- However, you should replace the carabiner when it’s damaged e.g. cracks, corrosion, excessive wear and tear, missing screws, malfunctioning gates or locking mechanism.
- It is also a good idea to replace the carabiner if it has been dropped from a huge distance.
- You should replace the sling when there are damages e.g. cuts, frays, tears.
- It is also a good idea to replace the sling after a huge impact (e.g. large falls with large loads). This is even if there is no visible damage.
Quantity needed:
- 6 to 10 pieces per person.
- You can share these on a climb.
Average cost:
- USD 10 to USD 20 for a mid-range option.
Accessories you may also need:
- Gear slings: to hang extra pieces of gear that you cannot accommodate on your harness. It is also useful if you do not want your harness to be pulled down with heavy gear.
15. Nut (a.k.a. Passive Protection Gear)
A nut is a small piece of equipment used to fit into the cracks in the rocks. It acts as a temporary anchor point for quickdraws.
You need nuts for:
- Rock climbing
How to choose the type of:
| Nut | Micro Nut | Hexentric | Tri-Cam | Tube Chock | |
| Suitable for | Tapering narrow- to medium-width cracks | Very thin cracks | Tapering cracks Widening cracks Parallel sided cracks | Parallel-sided crack Horizontal crack A crack that is too large for a nut | Parallel-sided crack Larger cracks |
| Not suitable for | Cracks with parallel sides | – | – | – | – |
| Strength | Strong | Not strong enough to hold a fall | Strong | Strong | Strong |
Other things to look out for:
- Passive protection gear is harder to use than active protective gear (see number 15)
- Passive protection gear is less costly than active protective gear (see number 15)
Typical lifespan:
- 5 years.
- However, you should replace your passive protection gear when there are damages e.g. cuts, frays, cracks
- It is also a good idea to replace your passive protection gear after a huge impact (e.g. large falls) or dropped from a huge distance. This is even if there is no visible damage.
Quantity needed:
- 10 to 14 pieces of varying sizes per person.
- You can share these with other climbers.
Average cost:
- USD 7 to USD 10 for a mid-range nut.
Accessories you may also need:
- Nut tool: to extract passive protection gear from the rocks. Useful to minimize wear and tear on the nuts when you force them out of the rocks. Some gear might be stuck and cannot be removed without a tool.
16. Cam (a.k.a. Active Protection Gear)
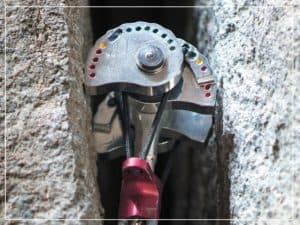
A cam is a small piece of equipment (but larger than a nut) used to fit into the cracks in the rocks. It acts as a temporary anchor point for quickdraws.
You need cams for:
- Rock climbing
- Mountaineering
How to choose the type of:
| Number of cam lobes | Typically 3 or 4. A smaller number of lobes can fit into tighter spaces and are less likely to move about during use. It is also lighter. A larger number of lobes is more secure as it has more contact points with the rocks. |
| Stem design | Can be a single stem o U-shaped stem. A single stem can fit into tighter spaces than a U-shaped stem. Both are operated slightly differently and some may find one easier to use than the other. |
| Number of axles | Can be single or double axle. A double axle is stronger and can expand wider as compared to a single axle. But it is also heavier. |
Other things to look out for:
- Active protection gear is easier to use than passive protective gear (see number 14)
- Active protection gear is more costly than passive protective gear (see number 14)
Typical lifespan:
- 5 years.
- However, you should replace your active protection gear when there are damages e.g. corrosion, cracks, loose joints, malfunctioning parts.
- It is also a good idea to replace your active protection gear after a huge impact (e.g. large falls) or dropped from a huge distance. This is even if there is no visible damage.
Quantity needed:
- 6 to 10 pieces of varying sizes per person.
- You can share these with other climbers.
Average cost:
- $50 to $70 for a mid-range option.
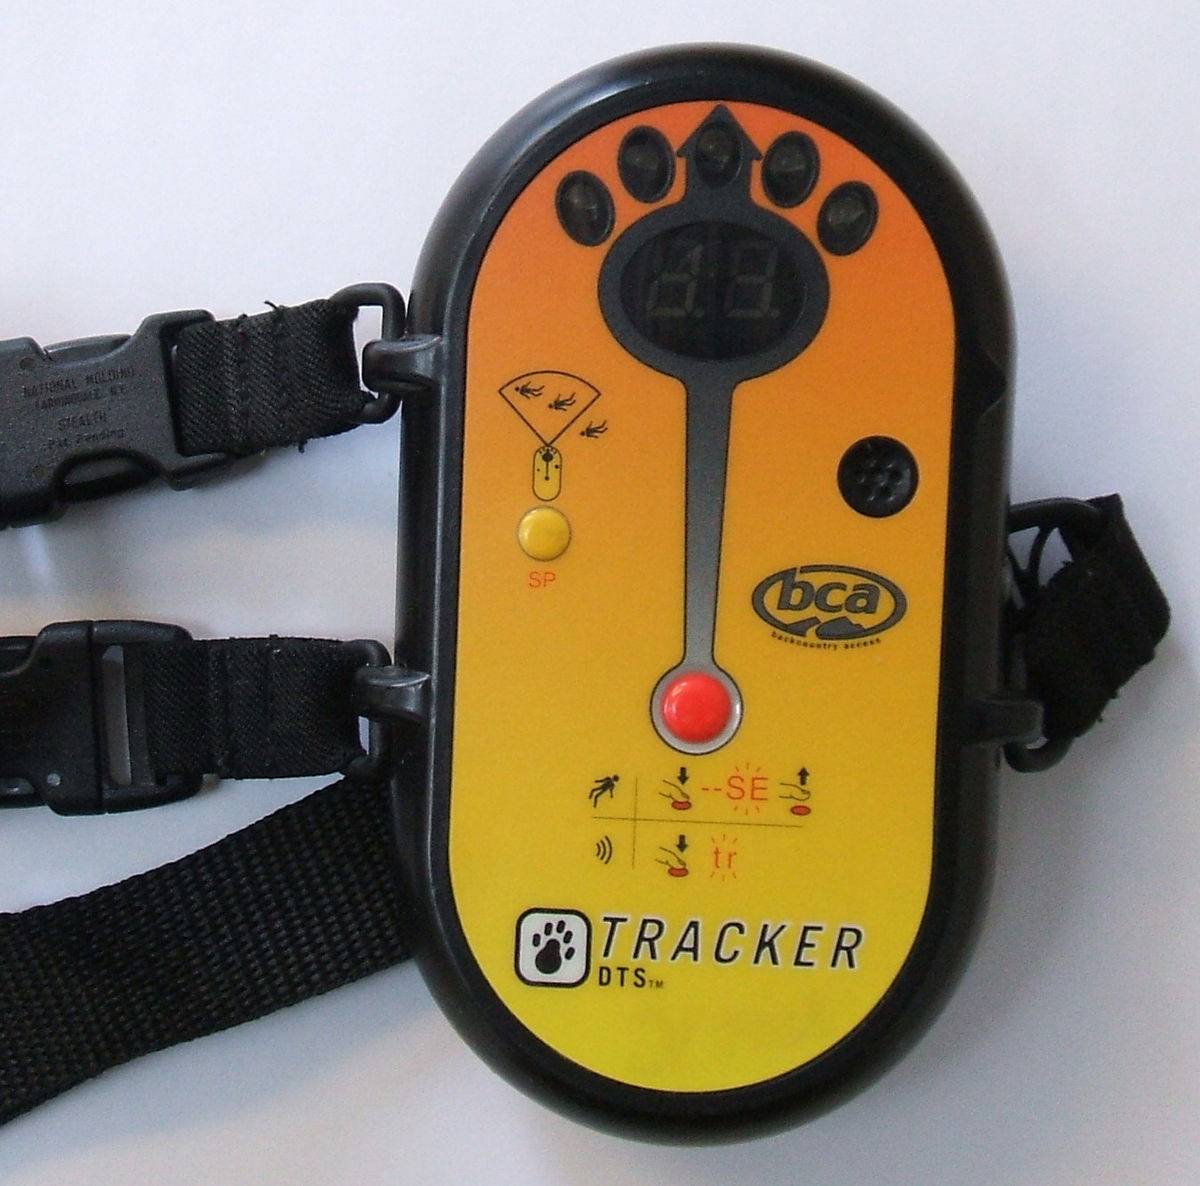
17. Avalanche Transceiver
You need avalanche transceivers for:
- Ice climbing
- Mountaineering in icy terrains
What are they used for:
- To locate climbers trapped by an avalanche.
- They send out and receive electronic signals from other transceivers.
How to choose the type of avalanche transceiver:
| Range | A wider range is better. But the actual range depends on the orientations of the transceivers in use. |
| Display screen | This displays the location of the trapped climbers. |
| Save mode | Some transceivers allow you to save the location of various trapped climbers. |
| Audio | Some transceivers offer audio guidance. |
Things to look out for:
- Check that all transceivers transmit and receive electronic signals using the same frequency.
- Always run a test beforehand to ensure every transmitter in your group can send and receive signals from one another. Check for compatibility across brands and models.
- They are sometimes sold in a set with other rescue items such as snow shovel and snow probe. These might be cheaper than if you were to buy the items separately.
Typical lifespan:
- Can last forever.
- You can consider replacing your transceiver if new models have better detection capabilities. Or if they come with additional useful features.
Average cost:
- USD 250 to USD 350 for a mid-range option.
18. Snow Probe
A snow probe is a stick used to locate climbers trapped in an avalanche. After locating the trapped climber via the transceiver, you use the snow probe to poke into the snow. This helps to pinpoint the exact location of the climber before digging.
You need snow probes are needed for:
- Ice climbing
- Mountaineering in icy terrains
How to choose the type of snow probe:
| Material | Typically aluminum or carbon. Aluminum is usually heavier but can penetrate dense snow. Usually cheaper. Carbon is lighter but less tough. Usually more costly. |
| Length | It should be a minimum of 6.5 feet (2 meters). The recommended length is between 8 and 10 feet (2.4 to 3 meters). A longer probe is less tiring when probing in deep snow. A longer probe gives you more space to grip it which makes it less likely for you to break the probe. |
| Ease of use | Some snow probes can be broken up into sections when not in use (like tent poles). Check that the mechanism to assemble the snow probe for use is easy and intuitive. |
Typical lifespan:
- Can last forever.
- Check for any damages before using e.g. corrosion, bent components
Quantity needed:
- 1 per person.
- You should not share your snow probe with other climbers. The person carrying the probe may be the one trapped.
Average cost:
- USD 40 to USD 60 for a mid-range option.
Accessories you may also need:
- Storage bag or wrap: to store the snow probe
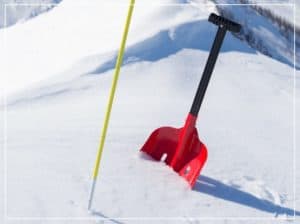
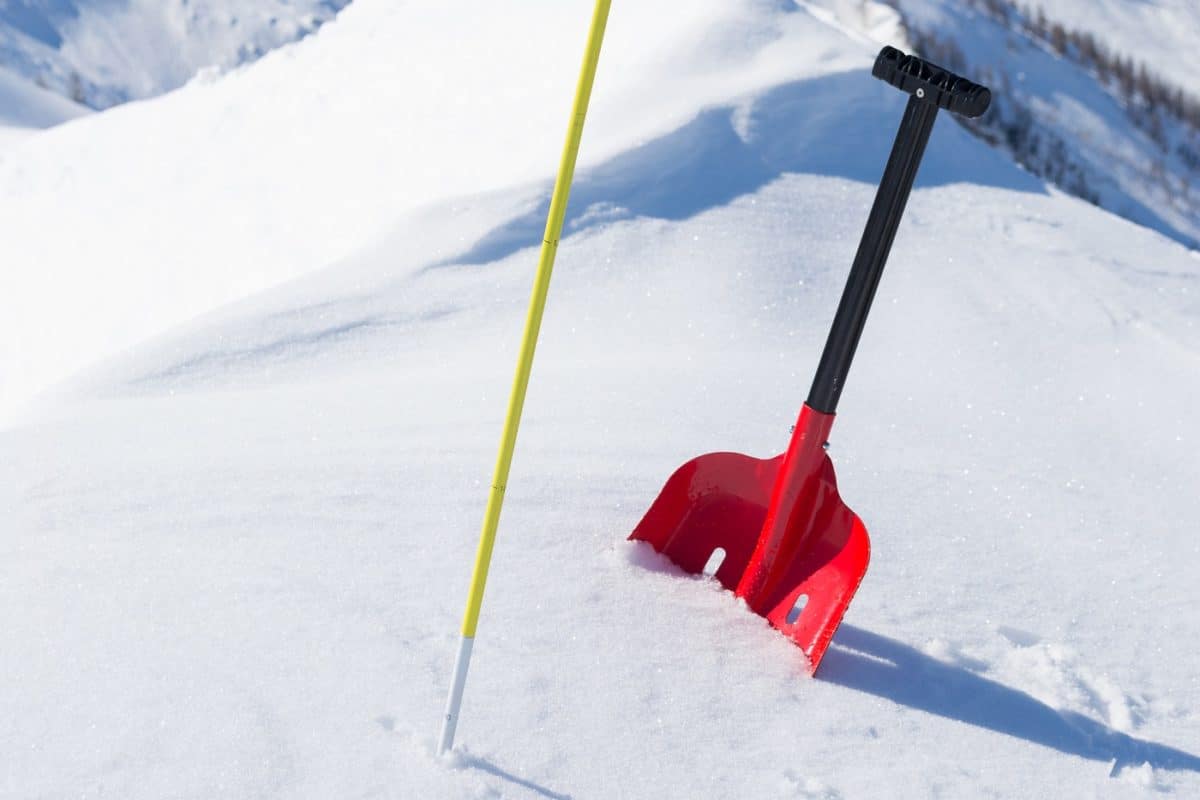
19. Snow Shovel
A snow shovel is used to:
- Extract climbers trapped by an avalanche.
- Dig into snow to check the conditions underground and assess the risks.
- Level the grounds for setting up camp.
- Dig a shelter during an emergency.
You need snow shovels for:
- Ice climbing
- Mountaineering in icy terrains
How to choose the type of:
| Material | Typically aluminum which is light, strong and durable. |
| Blade size | A large blade can dig through more snow but requires more strength and tires you out faster. A smaller blade allows you to dig faster and longer. |
| Blade edge | Can be smooth or serrated. A serrated edge helps to cut out ice. |
| Grip shape | Can be a T, D or L shaped grip. A T-shaped grip is light but might be difficult to use with some gloves. A D-shaped grip is usually heavier but easy to use. A T-shaped grip is light and easy to use. |
Other things to look out for:
- Some snow shovels have an adjustable shaft length.
- They are sometimes sold in a set with other rescue items such as avalanche transceiver and snow probe. These might be cheaper than if you were to buy the items separately.
Typical lifespan:
- Can last forever.
- Check for any damages before using e.g. excessive corrosion, loose components, damaged grip or blade which makes it difficult to use.
Quantity needed:
- 1 per person.
- You should not share your snow shovel with other climbers. The person carrying the shovel may be the one trapped.
Average cost:
- USD 30 to USD 50 for a mid-range option.
Accessories you may also need:
- Storage bags or covers: to cover the sharp ends of your snow shovel and prevent them from damaging your other gear