I first saw the dangers of belaying a heavier climber back when I started rock climbing in college. The climber fell almost the entire height of the rock wall before the belayer caught her. Needless to say, the climber stopped climbing for quite a while.
Belaying a heavier climber is always tough. Here are some tips to help you overcome many of the challenges!
This is Part 3 of 5 of the Learn To Belay Mini-series:
Part 1: How To Belay With An ATC
Part 2: How To Pass A Belay Certification Test
Part 3: How To Belay A Heavier Climber
Part 4: How To Belay From Above
Part 5: How To Set Up Top Rope Anchor
Risks Of Belaying A Heavier Climber
There are additional risks when you are belaying a heavier climber. Some of them are:
- Your grip is not strong enough to hold the brake strand during a fall.
- You may get lifted from the ground and lose control of the belay.
- If you are belaying a lead climber, you may be pulled into the first anchor point.
- If the distance between you and the climber is close, you may end up crashing into each other during a fall.
Belaying a heavier lead climber is the toughest.
It is easier if you are belaying off a top rope or belaying from above. But it is still important to know the risks. Even if you are not belaying a lead climber, it is good to follow the tips here as long as the climber is heavier than you.
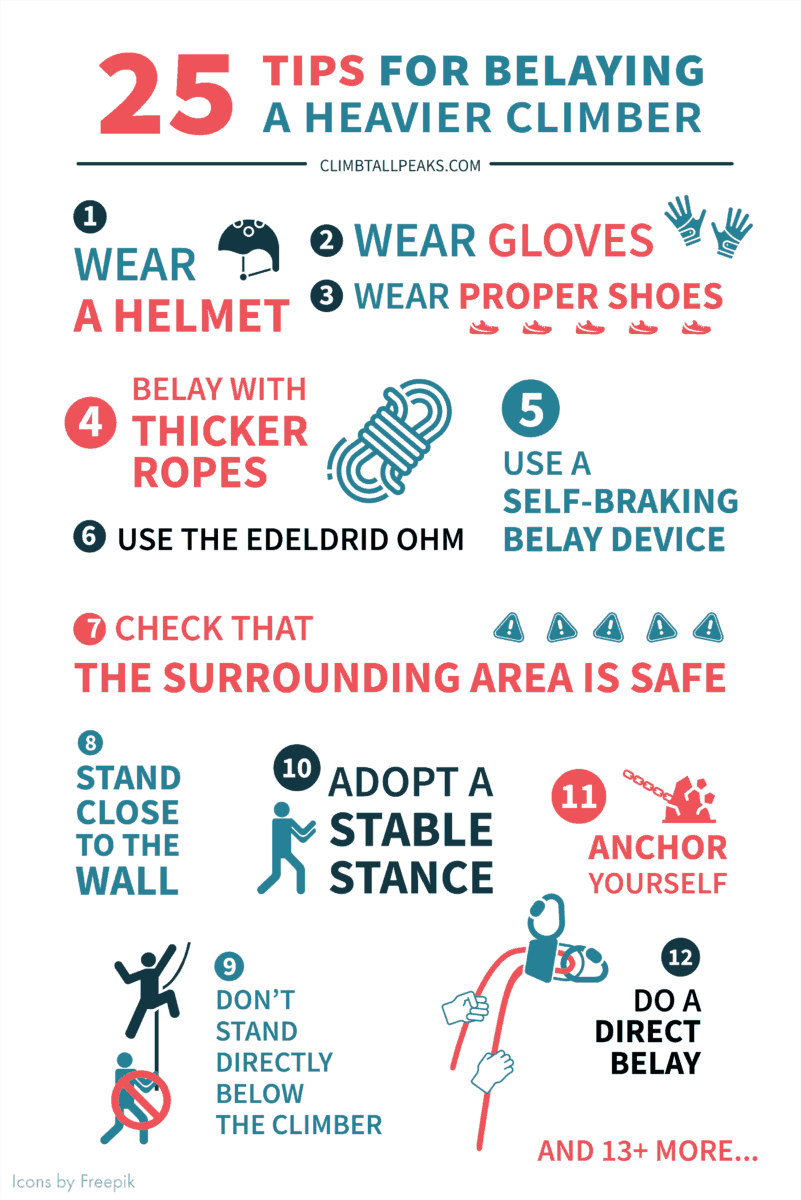
Save this cheatsheet to Pinterest!
Tip #1: Wear A Helmet
When belaying in an indoor gym, you may get away without a helmet. But it is good practice to put on a helmet when you are belaying outdoors.
There is always a risk of rocks or loose objects falling off during a climb.
If you are not wearing a helmet, you may instinctively let go of the climbing rope to shield yourself. This is not good news for the climber!
If you have really bad luck, you may even be knocked unconscious by a falling object. Uh-oh, your climber is now trapped without a belayer.
And remember the risks mentioned earlier?
When a heavier climber falls, it is likely that he may end up crashing into you. When that happens, the helmet will protect your head from the impact of the climber’s body or equipment.
Tip #2: Wear Gloves
I know that climbers and gloves don’t exactly go hand in hand (pun!). When I’m wearing gloves, my hands get all warm and sweaty. This becomes a pain when it’s my turn to climb later on.
Unfortunately, your grip is sometimes not enough to hold the fall of a heavier climber. The rope might slide through your grip and cause rope burns. When that happens, you may even let go of the rope completely.
The best way to prevent this is to put on a pair of gloves.
You can make do with any pair of old gloves that you don’t mind being roughed up. Choose one with a material that can help to increase friction on the rope. Check that the gloves don’t restrict any movement in your fingers for belaying.
If you are deadset against gloves, another option is to wrap your fingers and palms in climbing tape.
This probably won’t protect your hands as well as a pair of gloves. And it can be a pain to wrap up and take off all that tape.
Tip #3: Wear Proper Shoes
This may not seem obvious but protecting your feet is as important as protecting your head.
Proper shoes mean something like a pair of trainers or sneakers that cover your toes. They also should not slip off easily.
A fall by a heavier climber may lift you off the ground. Or it may pull you towards the rock wall. When that happens, you need your legs to regain your balance or to stop yourself from slamming into the wall.
If you are wearing a pair of slippers or sandals, you may stub your toes or cut your feet on sharp surfaces. Slippers and sandals may also slip off easily, leaving you barefooted.
Tip #4: Belay With Thicker Ropes
Climbing with thinner ropes has its benefits.
Thinner ropes are lighter and less bulky to carry around. And they are good for fast climbers since they cause less rope drag.
However, thinner ropes also have less friction and are harder to belay.
So when belaying a heavier climber, it is better to use thicker ropes. They provide more friction on the belay device.
Thicker ropes are also easier to grip and less likely to slip through your hands.
Tip #5: Use A Self-braking Belay Device
Self-braking belay devices help to brake the rope when there’s a quick pull from the climber’s end of the rope.
If you really do not want to wear gloves, using a self-braking belay device is a great alternative.
When using a self-braking belay device, you should still keep your brake hand on the rope. Do not rely on the belay device completely. But in an emergency, the self-braking belay device will hold the rope in place if you lose your grip.
A commonly used self-braking belay device is Petzl’s Grigri.
If you would rather stick to using an ATC for belaying, you should use one that comes with a high friction side. Unlike the regular ATC, the high friction side has grooves to increase the friction on the rope.
Tip #6: Use The Edeldrid Ohm
If you are frequently belaying a heavier lead climber, it may be worthwhile to invest in the Edeldrid Ohm.
The Edeldrid Ohm works like a self-braking belay device.
But instead of using it to belay, the climber attaches the Edeldrid Ohm to the quickdraw on the first anchor point. The lead climber clips the rope into the Edeldrid Ohm instead of the quickdraw.
The climber will not notice any difference during the climb. Only when the climber falls, the cam in the Edeldrid Ohm will help to brake the rope. This reduces the force transferred onto the belayer.
The Edeldrid Ohm can handle a weight difference of up to 88 lbs (40 kg) between the climber and belayer.
You can see the difference between belaying with and without the Edeldrid Ohm in this video:
.
Tip #7: Check That The Surrounding Area Is Safe
When belaying a heavier climber, always assume that you will be yanked off your feet during a fall.
Check the surrounding areas and see if there are sharp edges or objects that you may hit when that happens. Look out for jutting rocks or tree branches.
Depending on the fall, you may end up slamming into these areas at a very high speed. This can cause injuries and broken bones.
Tip #8: Stand Close To The Wall
It is common for a belayer to stand a distance away from the wall during a climb. It is less strenuous on your neck when you are looking up at the climber.
But the further away you are from the wall, the easier it is to be pulled forward and upwards by a climber’s fall.
So when you are belaying a heavier climber, try to stand as close to the wall as possible. Standing directly below the first anchor point is also better than standing off to one side. When the climber fall, you are less likely to get yanked off your feet.
Tip #9: Don’t Stand Directly Below The Climber
This may contradict tip number 8, but you should avoid standing directly below your climber.
Having your climber crashing straight down on you is a sure way to completely lose control of your belay.
Always pay attention to where your climber is moving. When he changes direction, you should also move to avoid being directly under him.
Tip #10: Adopt A Stable Stance
Instead of standing with your feet side by side, place your stronger leg in front of you. Keep your knees slightly bent.
Imagine yourself preparing for a tug of war. This stance gives you more stability. It is also easier to stop yourself from being dragged forward.
Tip #11: Anchor Yourself
If the climber is significantly heavier than you, you may want to anchor yourself as well.
There are a couple of ways to do this:
- The simplest way is to get another climber to hold on to your harness during the belay. He acts as the counterweight to prevent you from getting pulled off during a fall. He has to be as attentive as though he is the actual belayer.
- Another option is to tie some weights onto your harness’s belay loop like what is being done in this video below. But it is probably not very practical outside of a climbing gym.
- You can also consider wearing a heavy backpack to add some weight. But this may be very uncomfortable and even be dangerous when you get pulled off your feet.
- The proper way to do this is to secure yourself to an anchor point with some slings or runners.
- The challenge here is finding a proper anchor point. When setting up the anchor, it is crucial to keep the anchor, belayer, and climber (ABC) in a straight line. This means having an anchor directly below you while you are standing below the first anchor.
- If the ABC is not aligned, the climber and anchor point end up pulling you in different directions during a fall. You lose your belay stance and may even get injured.
- On the downside, tying the belayer to the anchor also creates a very hard catch for the climber.
Tip #12: Do A Direct Belay When Belaying From Above
When belaying a heavier climber from above, use a direct belay. This is a good way to prevent yourself from being dragged into the anchor point during a fall.
In a direct belay, you are not connected directly to the climber. You can move around and control the belay better during a fall.
When doing a direct belay, you need to use a self-braking belay device such as the Black Diamond ATC Guide Or Petzl’s Grigri. A regular aperture belay device such as the ATC does not provide enough friction to catch a fall.
Tip #13: Have The Climber Skip The First Anchor
The first anchor causes most of the problems when belaying a heavier lead climber.
Whenever the climber falls, you will be pulled into the first anchor point.
A solution is to avoid clipping into the first anchor point. This may not be possible for every climb. It is a good alternative if the start of the route is simple. Make sure that the climber is confident of not falling and that the second anchor is not too high up.
To protect the climber, you can put crash pads on the ground to provide a safe landing if the climber needs it.
If the conditions are not ideal, the climber will still need to clip into the first anchor point. And after clipping into the second anchor point, the climber can backtrack to unclip the first anchor point.
And if you don’t mind spending on another piece of gear, the climber can also use a stick clip.
A stick clip is simply a long pole that you can attach a quickdraw to at one end. The climber can reach up with the stick clip to attach the quickdraw to an anchor point that is higher up.
The climber can climb to the first anchor point, use the stick clip to secure the second anchor point and immediately unclip the first.
You can DIY your own stick clip as shown here:
Tip #14: Have The Climber Use 2 First Anchors That Are Side By Side
After clipping into the first anchor, the climber can try looking for another nearby anchor point.
Having 2 anchor points inside by side increases the friction on the rope. This can equalize up to 66 lbs (30kg) of weight difference between climber and belayer.
The downside to this is the increased rope drag when the climber is climbing.
You can see how this works in the video below. Watch from 1:00:
Tip #15: Have The Climber Avoid Traverse Routes
When a climber falls during a traverse, it usually creates a huge pendulum swing. This generates a huge pull on the belayer.
Belaying a climber on a traverse is always challenging. This is even more so when the climber is heavier than you.
Using double/ half ropes may help on a traverse route. But belaying with double/ half ropes is another challenge on its own.
Tip #16: Talk Through The Route With The Climber
Before climbing, you should talk through the route with the climber.
Ask the climber about his planned route and get him to highlight any areas where a fall is likely. This helps you to anticipate falls before they happen.
And if you are uncomfortable with any part of the route, you can also discuss alternative routes.
Tip #17: Stay In Constant Communication With The Climber
The climber can help you anticipate falls by shouting “watch me!”.
When that happens, you should quickly take in any slack in the rope and prepare to catch a fall.
Tip #18: Feed Slack Quickly When The Climber Is Clipping In
When belaying a heavy climber, it is crucial to minimize the slack in the rope to prevent huge falls.
However, when the lead climber is clipping in at the anchor point, it is important to give out slack quickly.
Giving out slack too slowly may cause short roping. This means that the climber does not have enough slack to clip into the anchor point. At best, this slows down the climb. At worst, the climber may lose his balance and fall.
If he falls, you need to take in the slack as quickly as possible to minimize the fall distance.
To give out slack quickly, slide your brake hand far back on the brake strand. At the same time, take a step back to minimize the slack in the rope.
When the climber is clipping in, step forward to provide some slack. Then, pull the rope upwards with your guide hand towards the climber to feed more slack.
Tip #19: Take Breaks
I often find belaying to be more tiring than climbing.
You are constantly straining your neck and you have to stay in the same position for long periods of time.
Belaying can also feel repetitive and it is easy to zone out after a while.
If you need a break, let your climber know and have him stop climbing for a while.
A belayer needs a break as much as the climber! It’s safer than losing your focus or attention when the climber is climbing.
Tip #20: Catch The Fall With Both Hands On The Brake Strand
When belaying a lead climber, a fall may pull you towards the first anchor point.
If your hand is still holding onto the climber’s end of the rope, it will get crushed between the belay device and the anchor point.
To avoid this, move your hand quickly to the brake strand. Holding the brake strand with both hands also increases the friction on the rope. This prevents it from slipping out of your grip.
Tip #21: Kneel Down To Catch A Fall
We talked about the belay stance in tip #10 above. You are standing with your legs apart, with your stronger leg in front of you.
When the climber is falling, bend your front knee to 90° and drop your back knee to the ground.
This adds a bit more weight to the belay. And it also adds a bit of distance between you and the climber. Hopefully, this also helps to prevent any collision.
Tip #22: Stay Upright When You Are Lifted Off Your Feet
When catching a fall, it is natural to move your weight back and sit on the harness.
But when you are lifted off the ground, try to keep yourself in an upright position. This gives you more control and you can use your legs to stop yourself from slamming into the wall. You can also regain your footing quickly in an upright position.
If you lean too far back, you may find yourself going into a horizontal position. You may end up losing control and spinning around.
Tip #23: Turn Your Head Away And Brace For Impact
If you think a crash between you and the climber is unavoidable, turn your head away. Your helmet can help shield you from the worst of it.
Close your mouth to prevent any impact from injuring your jaw.
Brace yourself for the impact.
But most importantly, focus on keeping your brake hand on the rope!
Tip #24: Practice In A Gym First
Before belaying a heavier climber outdoors, it is best to first practice in a climbing gym.
You can try out the tips listed here and see which one works best for you.
You should also get the climber to practice falling at various heights and positions. You can get a better sense of what happens in a different scenario. This helps you to learn how to deal with the falls in the future.
In case of an emergency, there are also instructors and climbers around to assist you.
Tip #25: Climb In An Area Where There Are More Climbers Around
When they are more climbers around, you can probably get some of them to help anchor you during a belay.
Even if you don’t, during an emergency, there are more people around to help you out.
This is Part 3 of 5 of the Learn To Belay Mini-series:
Part 1: How To Belay With An ATC
Part 2: How To Pass A Belay Certification Test
Part 3: How To Belay A Heavier Climber
Part 4: How To Belay From Above
Part 5: How To Set Up Top Rope Anchor
Save this cheatsheet to Pinterest!
This article is intended to provide general information. No article or video can replace qualified instruction, practice and experience. Your safety is your responsibility.